Forum Replies Created
-
AuthorPosts
-
LiveSmart Team
KeymasterWelcome! The LiveSmart AI Shopping Assistant is here to help you find, browse, and manage products on your shopping journey.
Interact with it by typing your requests or commands. You can search for products, view product details, manage your shopping cart, and more!Getting Started
- Just start chatting by typing your shopping requests in plain text. You can use any language you like.
- Alternatively you can voice your request by enabling the microphone icon.
- The AI can help narrow down items by name, type, color, category, price, description and more.
- You can browse, filter, add items to your cart, and check out – all with simple commands.
What You Can Ask
Examples of Shopping Requests:- Find pink top for gym for women
- Show me matching outfit
- Find black bags for shoulder with pockets
- Watches $20-$50
- Show variations of electra gym tank
- I want to see drones on sale
- Find men’s running shoes under $100
- Show tanks with polyester in large size
- I’m looking for discounted pants
- Show categories
- Go to clothing category
- Finde mir schwarze Hosen (find me black pants in German)
Refining Results
After you see a list of results, you can narrow them down further:
- Filter by color: Red only please, this will show red variations with carousel
- Filter by size: Show me medium size
- Want another price range: Under $80 only
Browsing & Product Actions
- View variations: Show other colors or Show size options. Variations are shown as carousel in the product tile
- Go to a product: When viewing a list, say Go to product detail page or Go there or Open last one
- Add to cart: Add to cart, Add this to cart, or say the product name (e.g., Add Electra gym tank to cart)
- Buy Direct: Click the Buy button on the product tile for direct purchase.
- Watch for promotions: Click the Watch button on a product to get notified next time you visit if it goes on sale or has a promotion.
- List Categories: Show categories.
- Go to watches category: Redirects to watches.
Managing Your Cart & Navigation
- See your cart: Go to cart page
- Remove an item: Remove [item name] from cart
- Empty cart: Empty cart or Clear cart
- Go to checkout: Go to checkout
- See terms and conditions: Go to terms
- See refund policy: Go to refund page
Tips & Features:- Tell the assistant your name for more personalized interaction.
- You can ask in any language and will receive relevant response.
- Your “watched” items will be remembered! If they go on promotion, you’ll be shown them first on your next visit.
- You can mix criteria: red dress for party under $70 or kids jackets waterproof in green.
- No need to use exact product names – be as descriptive as you like!
Full Example Sessions
-
User: Find tops for gym for women
Assistant: [Shows gym tops for women]
User: Yellow only please
Assistant: [Shows only yellow ones]
User: Go there
Assistant: [Opens product detail page]
User: Add to cart
Assistant: [Opens cart page] -
User: Watches $40-$50
Assistant: [Shows watches in that price range]
User: Watch this
Assistant: [Marks product as watched; will notify on promotion]
User: Buy last one
Assistant: [Added to cart]
User: Go to cart page
Assistant: [Opens cart page] -
User: Go to bags category
Assistant: [Opens bags category]
User: List men
Assistant: [As there are two subcategories, list them, so the user can choose]
User: Find me red tanks
Assistant: [Lists tanks]
User: Men only please
Assistant: [Lists only men tank tops]
Video tutorials
Installation Guide
Shopping Guide
Shopping Guide with Voice Control
KeymasterSummary
LiveSmart AI Video offers the possibility to monetize incomes by enabling subscriptions for LiveSmart customers and using it as SaaS. Customers are organized in tenants, or semantic organizational structures with own configuration, branding, logo and user interface. One tenant can be any client of LiveSmart owner or different departments. For example LiveSmart can have several tenants – company1, company2, company3 – and each of them can have many users sharing own configuration, branding and payment plan. Monetization functionality is available for customers with Extended license.
Payment and subscription
Owner of LiveSmart can enable or disable subscriptions globally for the site and set different tenants to be paid. Also can set different payment plans with different time intervals and prices and check payment subscription history. Admin user can also set a usage package by minutes. Subscriptions can be paid by using the most popular payment gateways – PayPal, Stripe and Authorize.net. By default payment is set to test mode. Also payments are not recurring. Subscription is a one time payment and when is due to expire, tenant admin will receive a notification email. Body, title and notification days are configurable.
– how to set up a PayPal account. Check this tutorial on how to create ClientID and SecretID
– how to set up a Stripe account. Check this tutorial on how to create publishable API keys for Stripe:
– how to set up an Authorize.net account. Check this article on how to obtain Login ID, Client ID and Transaction Key.
Tenants, organisers (hosts) and users
Owner of LiveSmart is the super administrator. He can add hosts, organized in tenants and can set a tenant admin. Tenant admin is responsible for payments and will receive notification emails when subscription is due to expire. Each tenant has their own chat and recording history and can set up their own users.
Demo
You can login to the demo dashboard to test the subscription functions. There are two accounts with enabled payment: admin tenant with paytestadmin/paytest and regular user paytest/paytest. Admin tenant can also check tenant recordings, chat history, manage other organisers and users of the tenant.
KeymasterLiveSmart AI Video feature combines the amazing capabilities of OpenAI ChatGPT with a video avatar by your choice. Interact with one of the greatest AI generated video avatars having a meaningful conversation on a variety of topics.
[livesmart_ai_widget room="ai"]
KeymasterLaunch lifelike AI video agents on your site in minutes. LiveSmart pairs OpenAI-powered conversations with your choice of video avatars from HeyGen or D-ID – or go audio-only with ElevenLabs. Engage, qualify, support, and convert visitors through natural, on-brand interactions that can tap live data in real time.
Why teams choose LiveSmart
- Human-like conversations: Natural voice and video avatars that feel personal and on-brand
- Your stack, your rules: Use HeyGen or D-ID for video, ElevenLabs for audio, and OpenAI, OpenRouter or Anakin.ai for the brain
- Real-time answers: Connect “Advanced Tools” to fetch live data (weather, stock prices, bookings, inventory, etc.)
- Embed anywhere: Add to any site or app via iframe, plus a WordPress plugin with shortcodes included
- SaaS-ready: Multi-tenant monetization module included (from version 1.0.6)
- Fast setup: Self-hosted, simple install, and you keep control of your API keys
Requirements and installation
Server requirements
- PHP 8.1+ and MySQL
- Node.js v16+
- HTTPS recommended
API keys (choose what you need)
- Video avatars: HeyGen and/or D-ID
- Audio-only avatars: ElevenLabs
- AI models: OpenAI, OpenRouter or Anakin
Installation
- Get LiveSmart Server Video from CodeCanyon;
- Follow the instructions for LiveSmart Server Video installation;
How to get API keys
HeyGen
- Go to https://heygen.com/
- Create your account
- Open API settings: https://app.heygen.com/settings?nav=API
D-ID
- Go to https://studio.d-id.com/
- Use the trial token or upgrade your plan: pricing
- Generate your token: account settings
OpenAI
- Go to https://platform.openai.com/
- Create your account
- Generate a key: API keys
ElevenLabs
- Go to https://elevenlabs.io/
- Create your account
- Open API keys: settings
- Create an API key
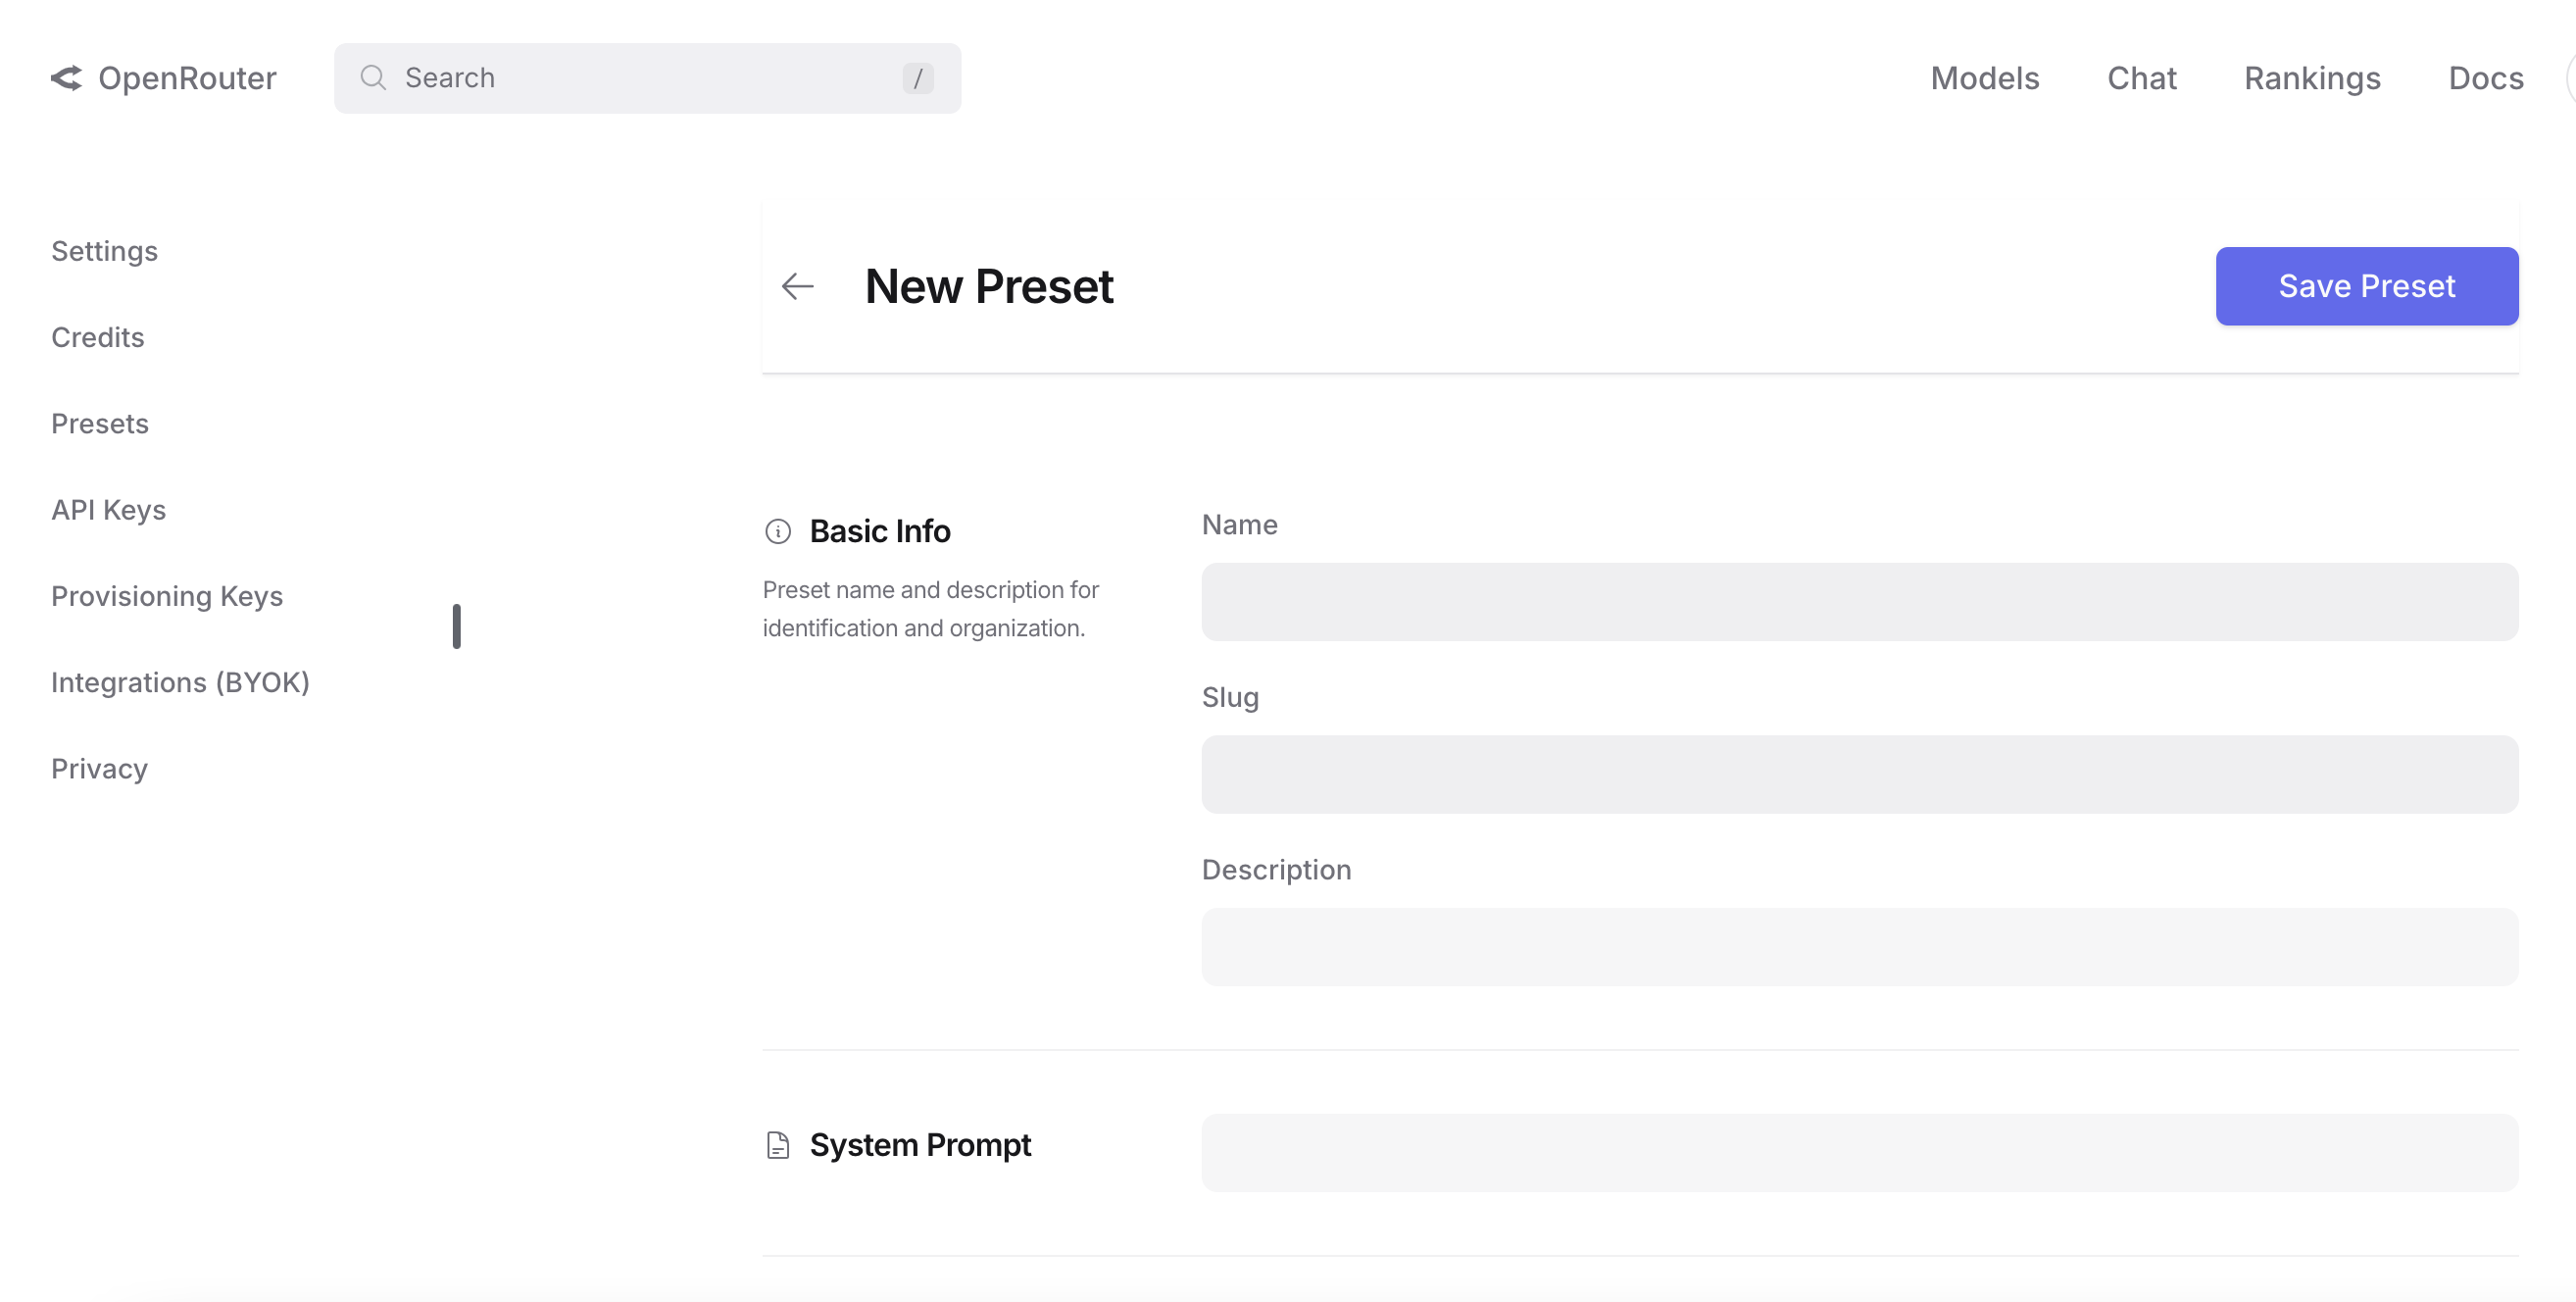
OpenRouter (alternative to OpenAI / unfiltered models)
- Go to https://openrouter.ai
- Create your account
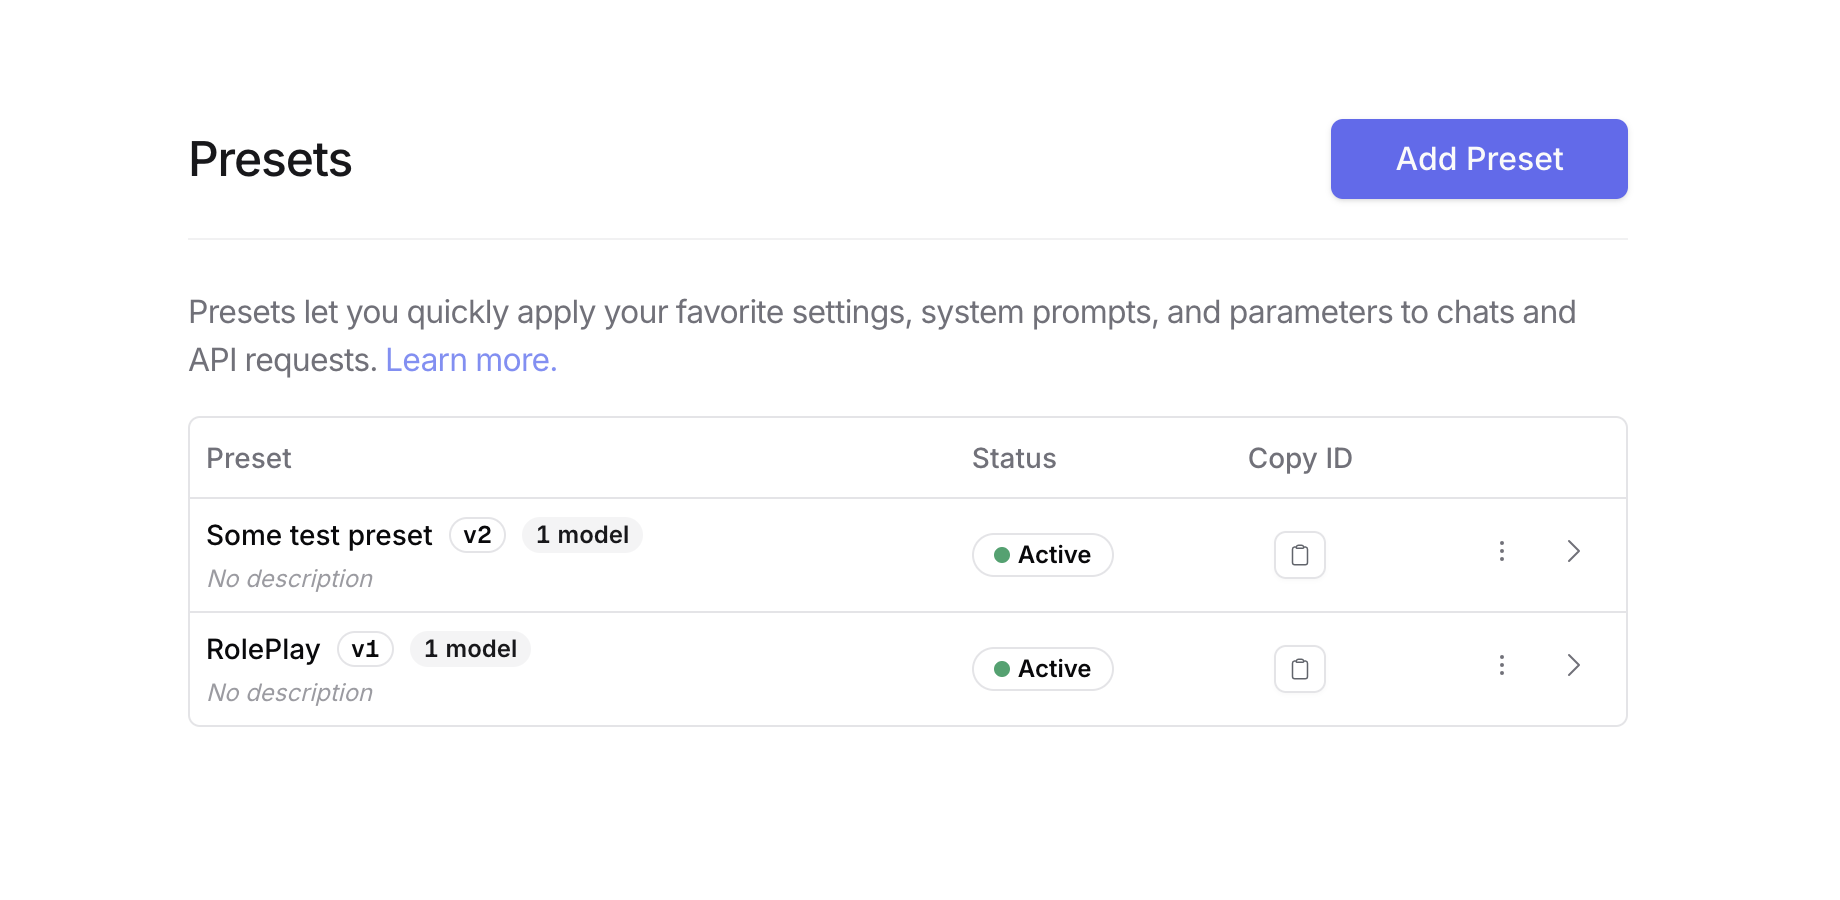
- Generate an API key in Settings → API Keys
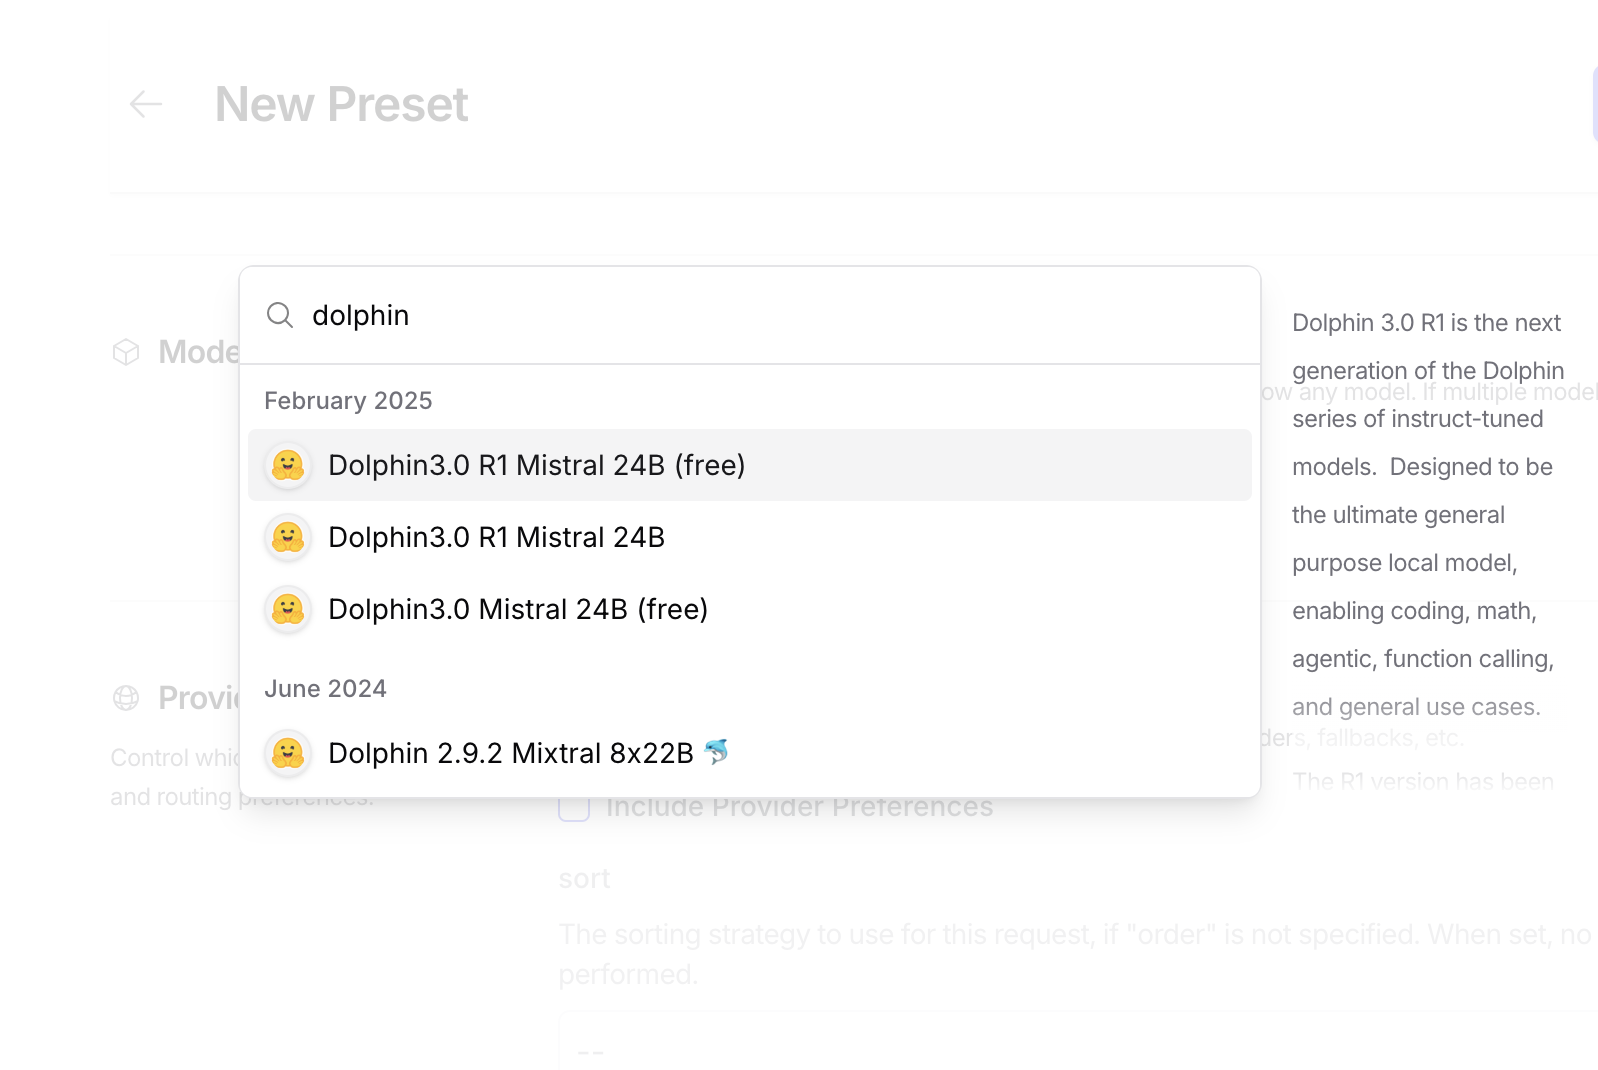
- Create a Preset (e.g., Dolphin Mixtral) and add your system prompt
- Copy the Preset ID and use it in LiveSmart
Anakin (another alternative to OpenAI / unfiltered models)
- Go to https://anakin.ai/;
- Create your account;
- Upgrade your plan to paid one. API integration is available only to paid users;
- Generate a token from Personal -> Settings -> API Access Token. Please have in mind that this token will be visible only when you create it;
- Create an app. Go to App Studio and choose Create App. Give it a name and choose Chatbot. Choose the Dolphin Mixtral model and add your prompt there.;
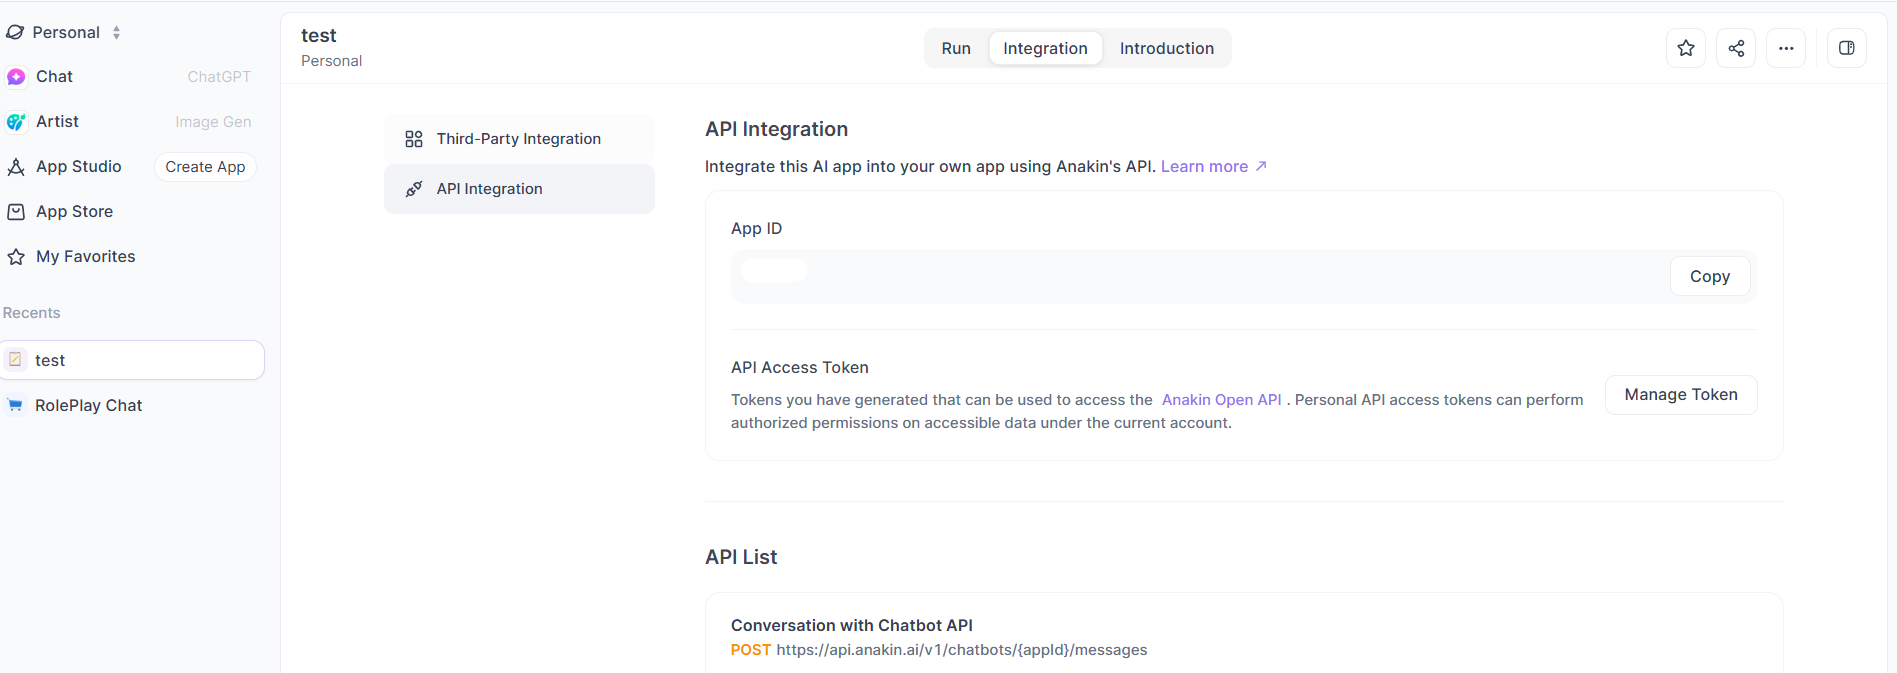
- Click on the created App and choose the Integration tab. Get the app ID from there and use if for your meeting room;
Use cases
- Ecommerce assistant: Product details, availability, pricing, and recommendations
- First-line support: Answer FAQs, triage, and route issues 24/7
- Healthcare operator: Check availability and book appointments
- City guide: Upcoming events, attractions, and festivals
- Travel companion: Plan routes and find local spots
- Business assistant: Reminders and meeting info
- Airports and travel: Flight information and ticket help
How it works: train avatars for real data
- Persona and tone: Set avatar behavior and greeting, add quick-reply phrases
- Live data: Plug in “Advanced Tools” to fetch weather, news, booking, inventory, pricing, and more
- UX controls: Choose layouts, enable recording, schedule availability, and set exit behavior
User guide
Avatar behavior (tone and rules)
Use the “Avatar attitude” field to set persona, brand voice, and instructions. Example:
“You are a streaming avatar from LiveSmart, a company specializing in video communications. Your name is Monica. If asked, provide contact@livesmart.video. Keep answers brief and reply only to the latest question. If asked how this works, explain it’s a LiveSmart integration with HeyGen and OpenAI.”Greeting text and placeholders
Set a greeting in “The avatar will start the conversation with this text if provided.”
- Use placeholders:
Hello {{name}}, this is Angela and I will guide you today. - Add chat instructions with “|” separator:
Hello {{name}}, this is Angela. Please open the chat for more instructions|This text will appear in the chat
Predefined phrases
Add comma-separated suggestions to appear in chat. See the main demo for examples.
Subtitles
Enable or disable subtitles (enabled by default).
Voice speed
Adjust the avatar voice speed with the slider.
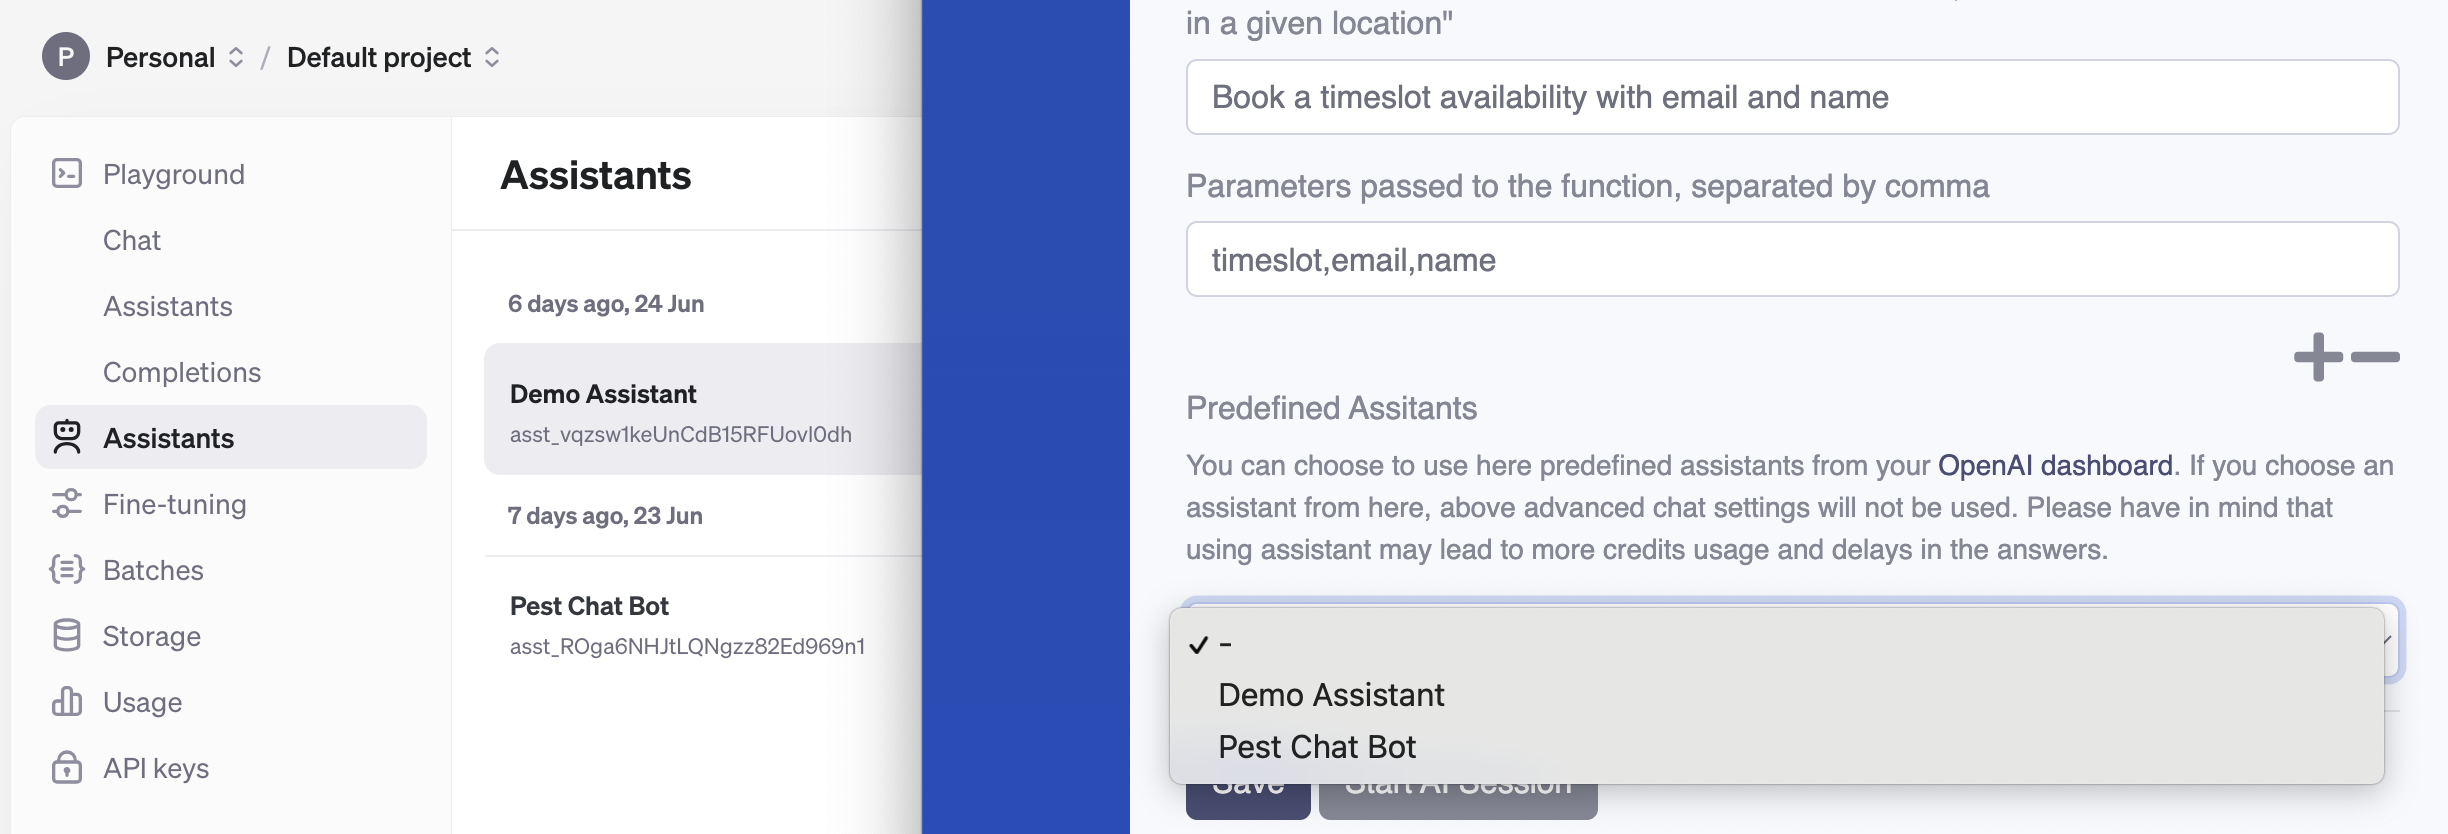
Advanced Tools (function calling)
Connect live data via
src/callTools.js. Example:- Function:
getCurrentWeather - Description: Get the current weather in a given location
- Parameters:
location,unit(unit optional; Celsius/Fahrenheit)
Add these in Dashboard → Rooms → AI Avatars → Advanced Tools. The description helps the AI decide when to call the function (e.g., “What’s the weather in San Francisco?”).
Sample API calls documentation: https://www.new-dev.com/videoaidoc/OpenRouter or Anakin models (optional)
Use OpenRouter to access models like Dolphin Mixtral, Gemini, Copilot, DeepSeek, and more.
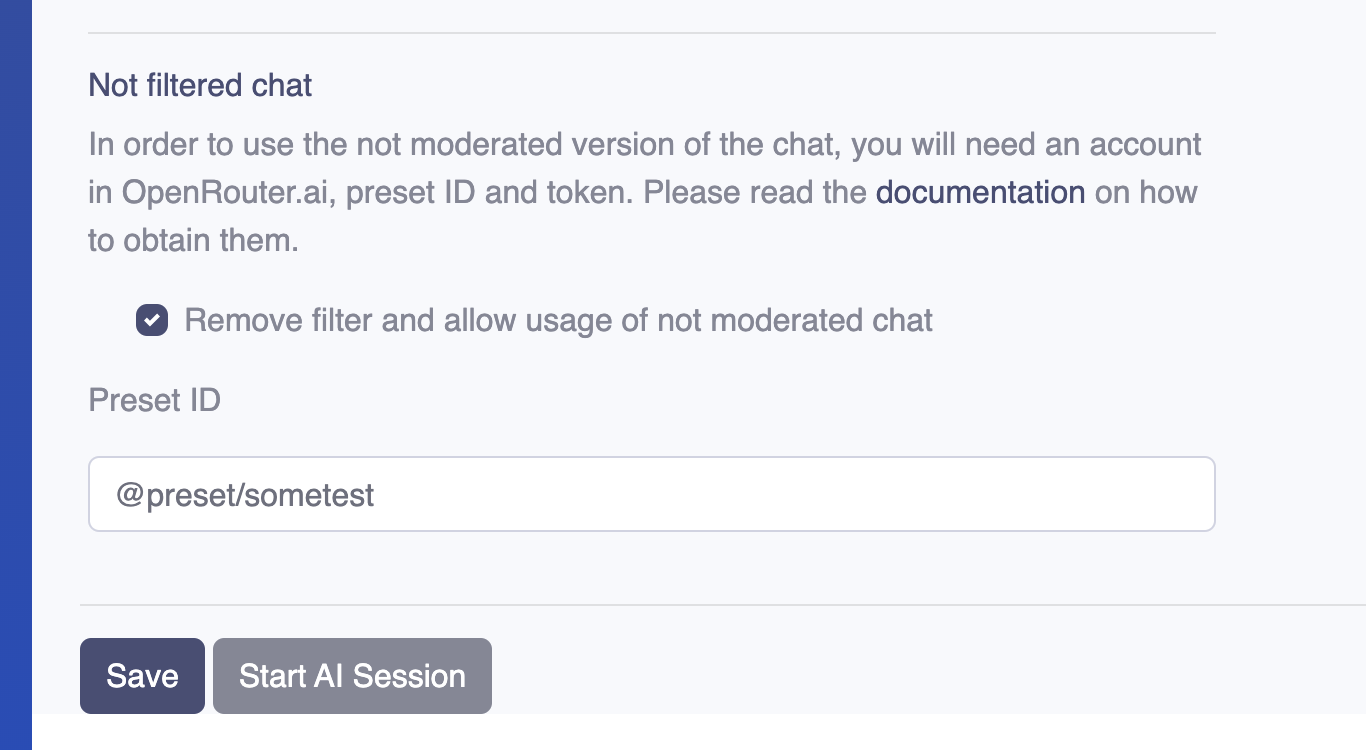
- Create a Preset with your system prompt and copy the Preset ID
- In the LiveSmart Dashboard, check “Remove filter and allow usage of not moderated chat” and paste the Preset ID
- You can also use any model ID from the available models page (e.g.,
openai/gpt-3.5-turbo)
Docs: https://openrouter.ai/docs/quickstart
Another option is using Anakin.ai
After you create the account, have the token and upgrade your plan, you need to create an app. Go to App Studio and click on Create App:
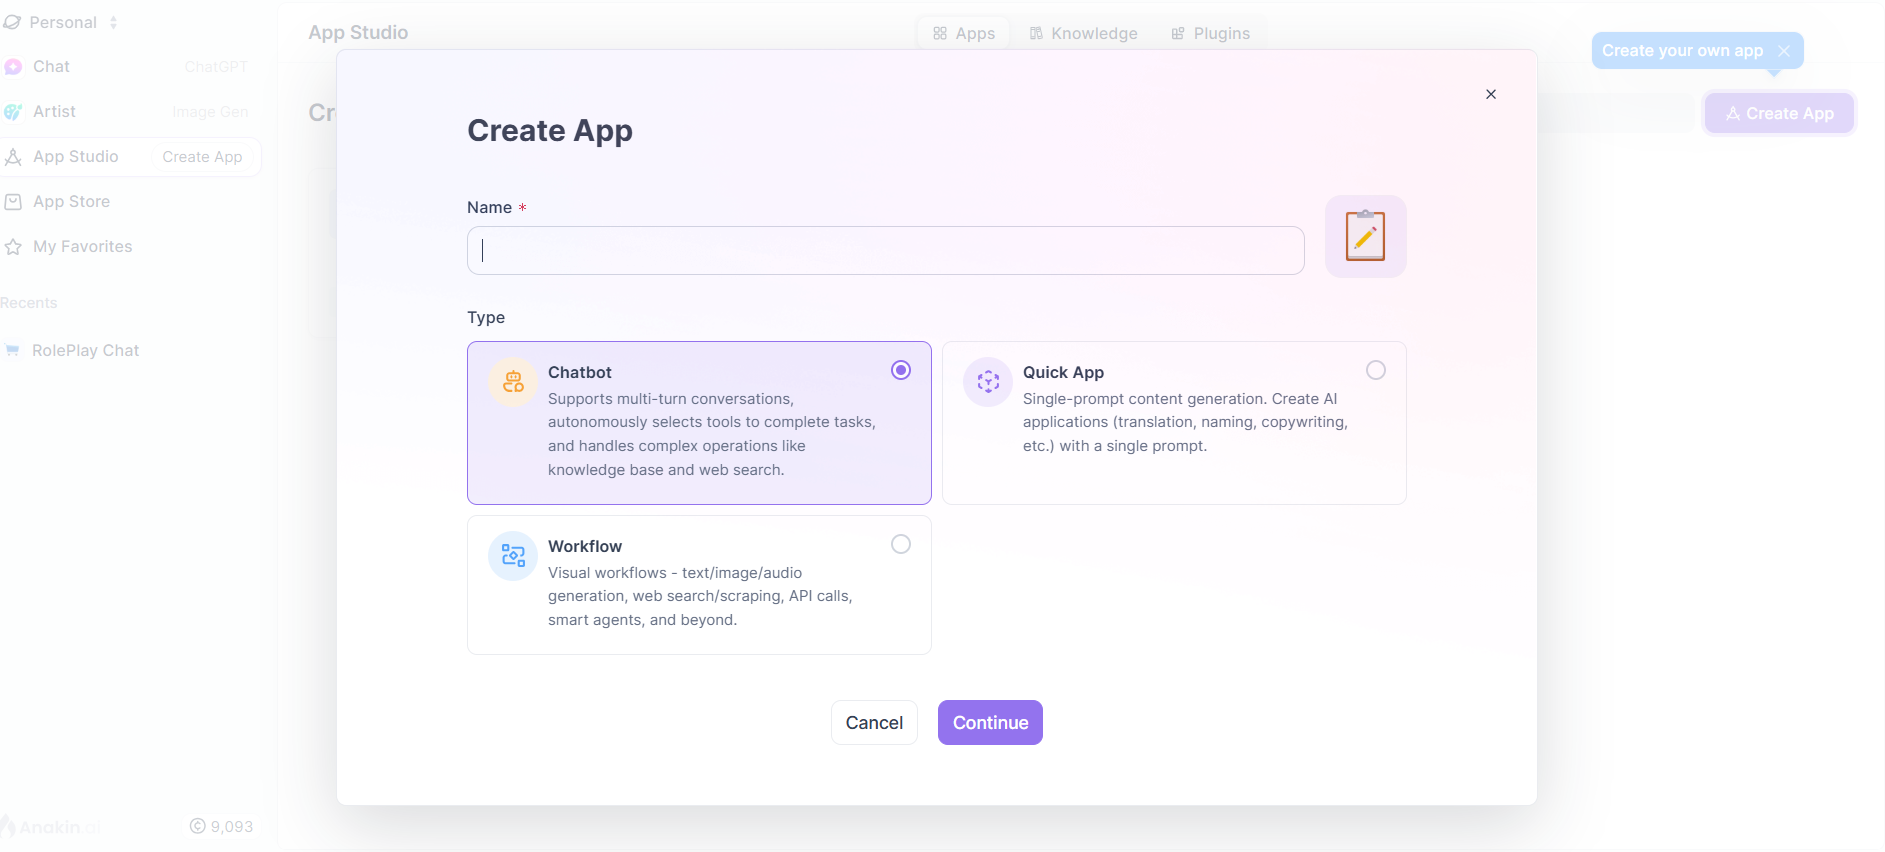
Then choose the Dolphin Mixtral model (actually you can choose any model including Gemini, Copilot, DeepSeek, etc) and set your desired prompt:

Choose the App ID from the Integration tab of the created Chatbot:
In order to activate the not moderated version of LiveSmart, you need to check “Remove filter and allow usage of not moderated chat” from the Dashboard and fill in the application ID you already have:
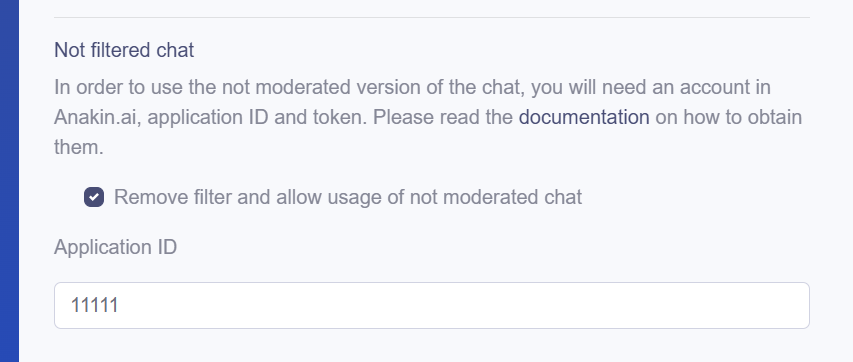
For more information about using the Anakin.ai, please read the documentation page.
Predefined assistants (OpenAI)
Create an Assistant in your OpenAI dashboard (upload files, add instructions) and assign it to an avatar in LiveSmart (Rooms → AI Avatar → Predefined Assistants).
Embed in any website
Use the iframe snippet below to embed an avatar anywhere:
<iframe id="lsv_iframe" src="YOUR_AVATAR_PAGE"
allow="camera; microphone; fullscreen; autoplay; encrypted-media;"
style="background-color:#ffffff; padding:0; margin:0; border:0;"
width="100%" height="600">
WordPress integration
A WordPress plugin is included. It adds the LiveSmart Dashboard to your admin panel and provides a shortcode:
[livesmart_widget room="NAME_OF_THE_ROOM"]Monetization (SaaS)
LiveSmart includes a SaaS/monetization module from v1.0.6. Learn more: https://livesmart.video/knowledge-base/monetization/
Frequently asked questions
What are the limits of HeyGen’s free API?
10 credits/month (1 credit = 5 minutes of speech), up to 32 avatars and 120+ voices, up to 1,000 characters per speech request (watermark applies), and up to 3 avatar sessions at once.
Details: official limits • Upgrade: plansWhat are the limits of D-ID’s trial API?
14-day trial. Pricing: https://www.d-id.com/pricing/api/
Is OpenAI free?
No. You pay per model and token usage. Pricing: https://openai.com/api/pricing/
How do I get HeyGen paid API credits and more avatars?
Purchase credits here: https://labs.heygen.com/interactive-avatar (see “purchase API Credits”). Paid API plans start at $99/month (Pro).
How can I train avatars?
- Simple: In the Dashboard, use “Avatar attitude” to define persona, behavior, and provide your domain knowledge.
- Advanced: Add your functions in
src/callTools.jsand define them in Advanced Tools (function, description, parameters). Examples:- Weather:
getCurrentWeather(location, unit) - Booking flow:
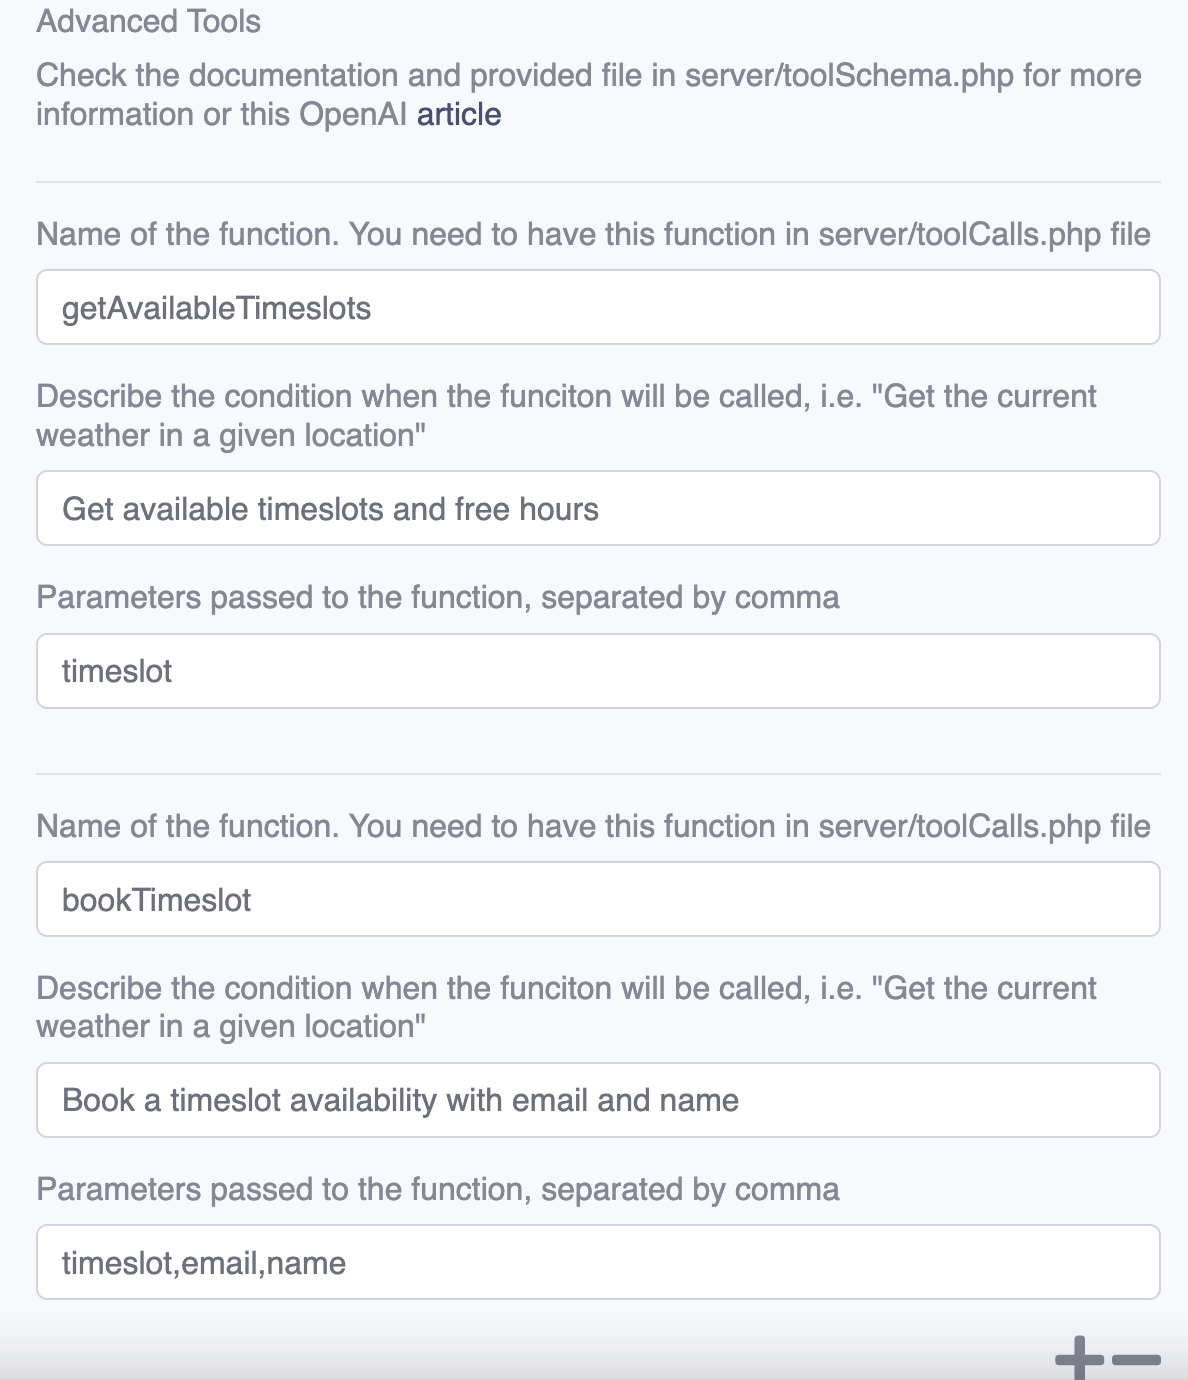
getAvailableTimeslots(...)→bookTimeslot(email, name, timeslot)
- Weather:
- OpenAI Assistants: Create an Assistant in OpenAI and assign it in Rooms → AI Avatar → Predefined Assistants.
Can I use OpenAI gpt-4o or gpt-5o?
Yes. Please check model pricing: https://openai.com/api/pricing/
The mic icon does nothing on iPhone Safari/Chrome
Make sure Dictation is enabled: Settings → General → Keyboard → Enable Dictation. More info: Apple guide.
If the avatar page is embedded in an iframe, include permissions:<iframe id="lsv_iframe" src="YOUR_AVATAR_PAGE" allow="camera; microphone; fullscreen; autoplay; encrypted-media;" style="background-color:#ffffff; padding:0; margin:0; border:0;" width="100%" height="600">Can I integrate LiveSmart AI into other platforms?
Yes. A WordPress plugin is included with a shortcode:
[livesmart_ai_widget room="NAME_OF_THE_ROOM"]
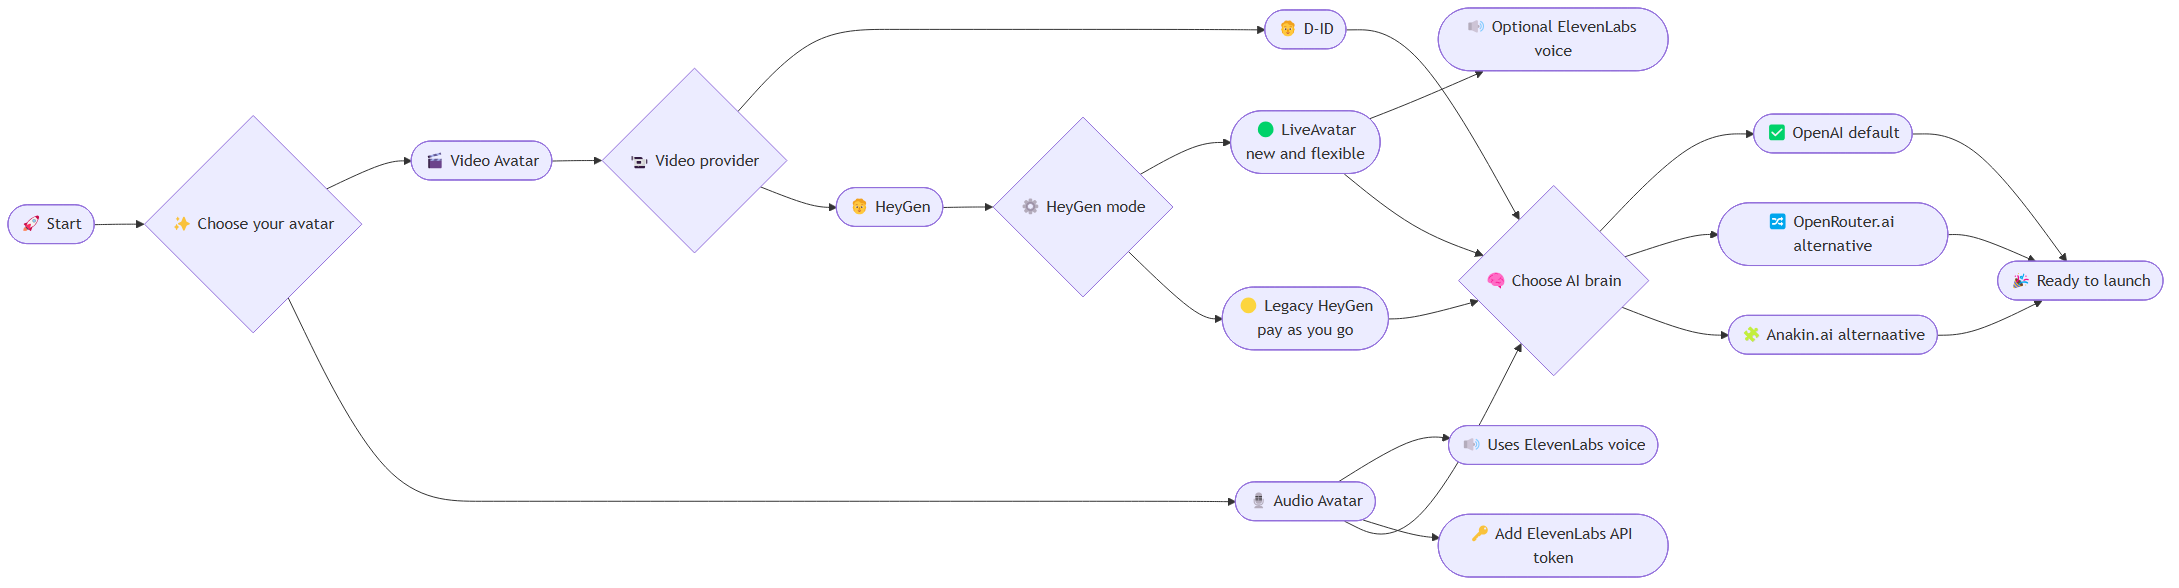
Or embed via iframe (see snippet above).KeymasterLaunch lifelike AI video agents on your site in minutes. LiveSmart pairs OpenAI-powered conversations with your choice of video avatars from LiveAvatar, legacy HeyGen or D-ID – or go audio-only with ElevenLabs. Engage, qualify, support, and convert visitors through natural, on-brand interactions that can tap live data in real time.
Why teams choose LiveSmart
- Human-like conversations: Natural voice and video avatars that feel personal and on-brand
- Your stack, your rules: Use LiveAvatar, HeyGen or D-ID for video, ElevenLabs for audio, and OpenAI, OpenRouter or Anakin.ai for the brain
- Real-time answers: Connect “Advanced Tools” to fetch live data (weather, stock prices, bookings, inventory, etc.)
- Embed anywhere: Add to any site or app via iframe, plus a WordPress plugin with shortcodes included
- SaaS-ready: Multi-tenant monetization module included (from version 1.0.6)
- Fast setup: Self-hosted, simple install, and you keep control of your API keys
Try live demos
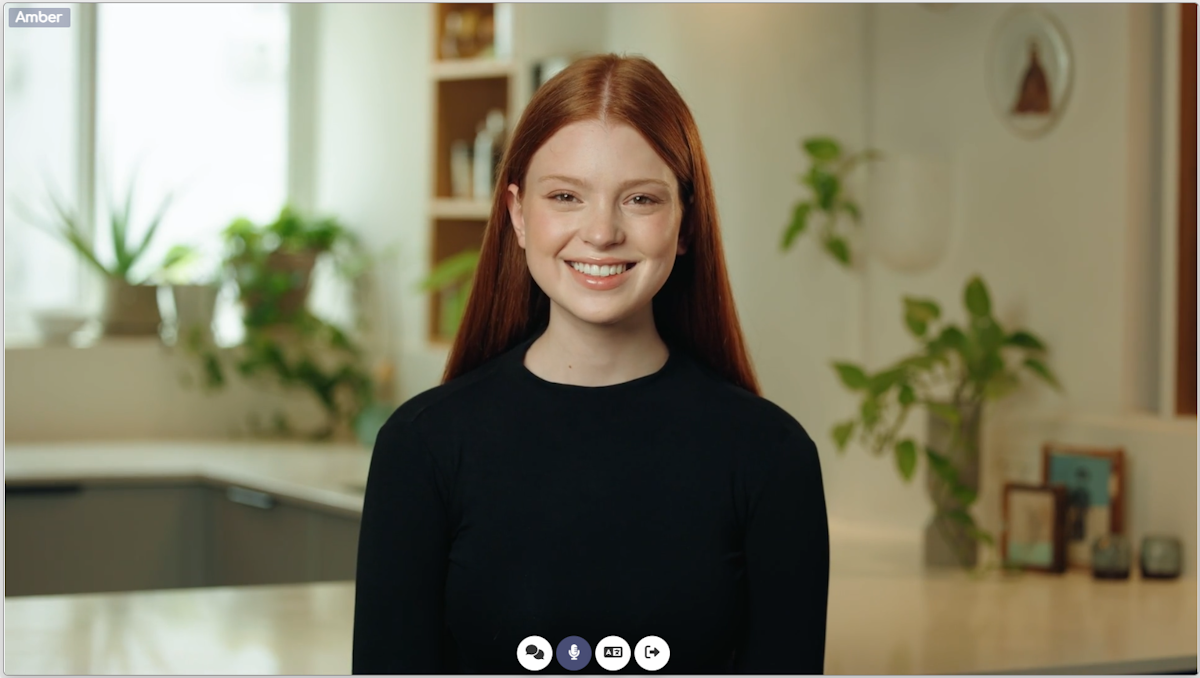
D-ID avatar: Chat with Amber
Booking assistant: Angela guides your booking

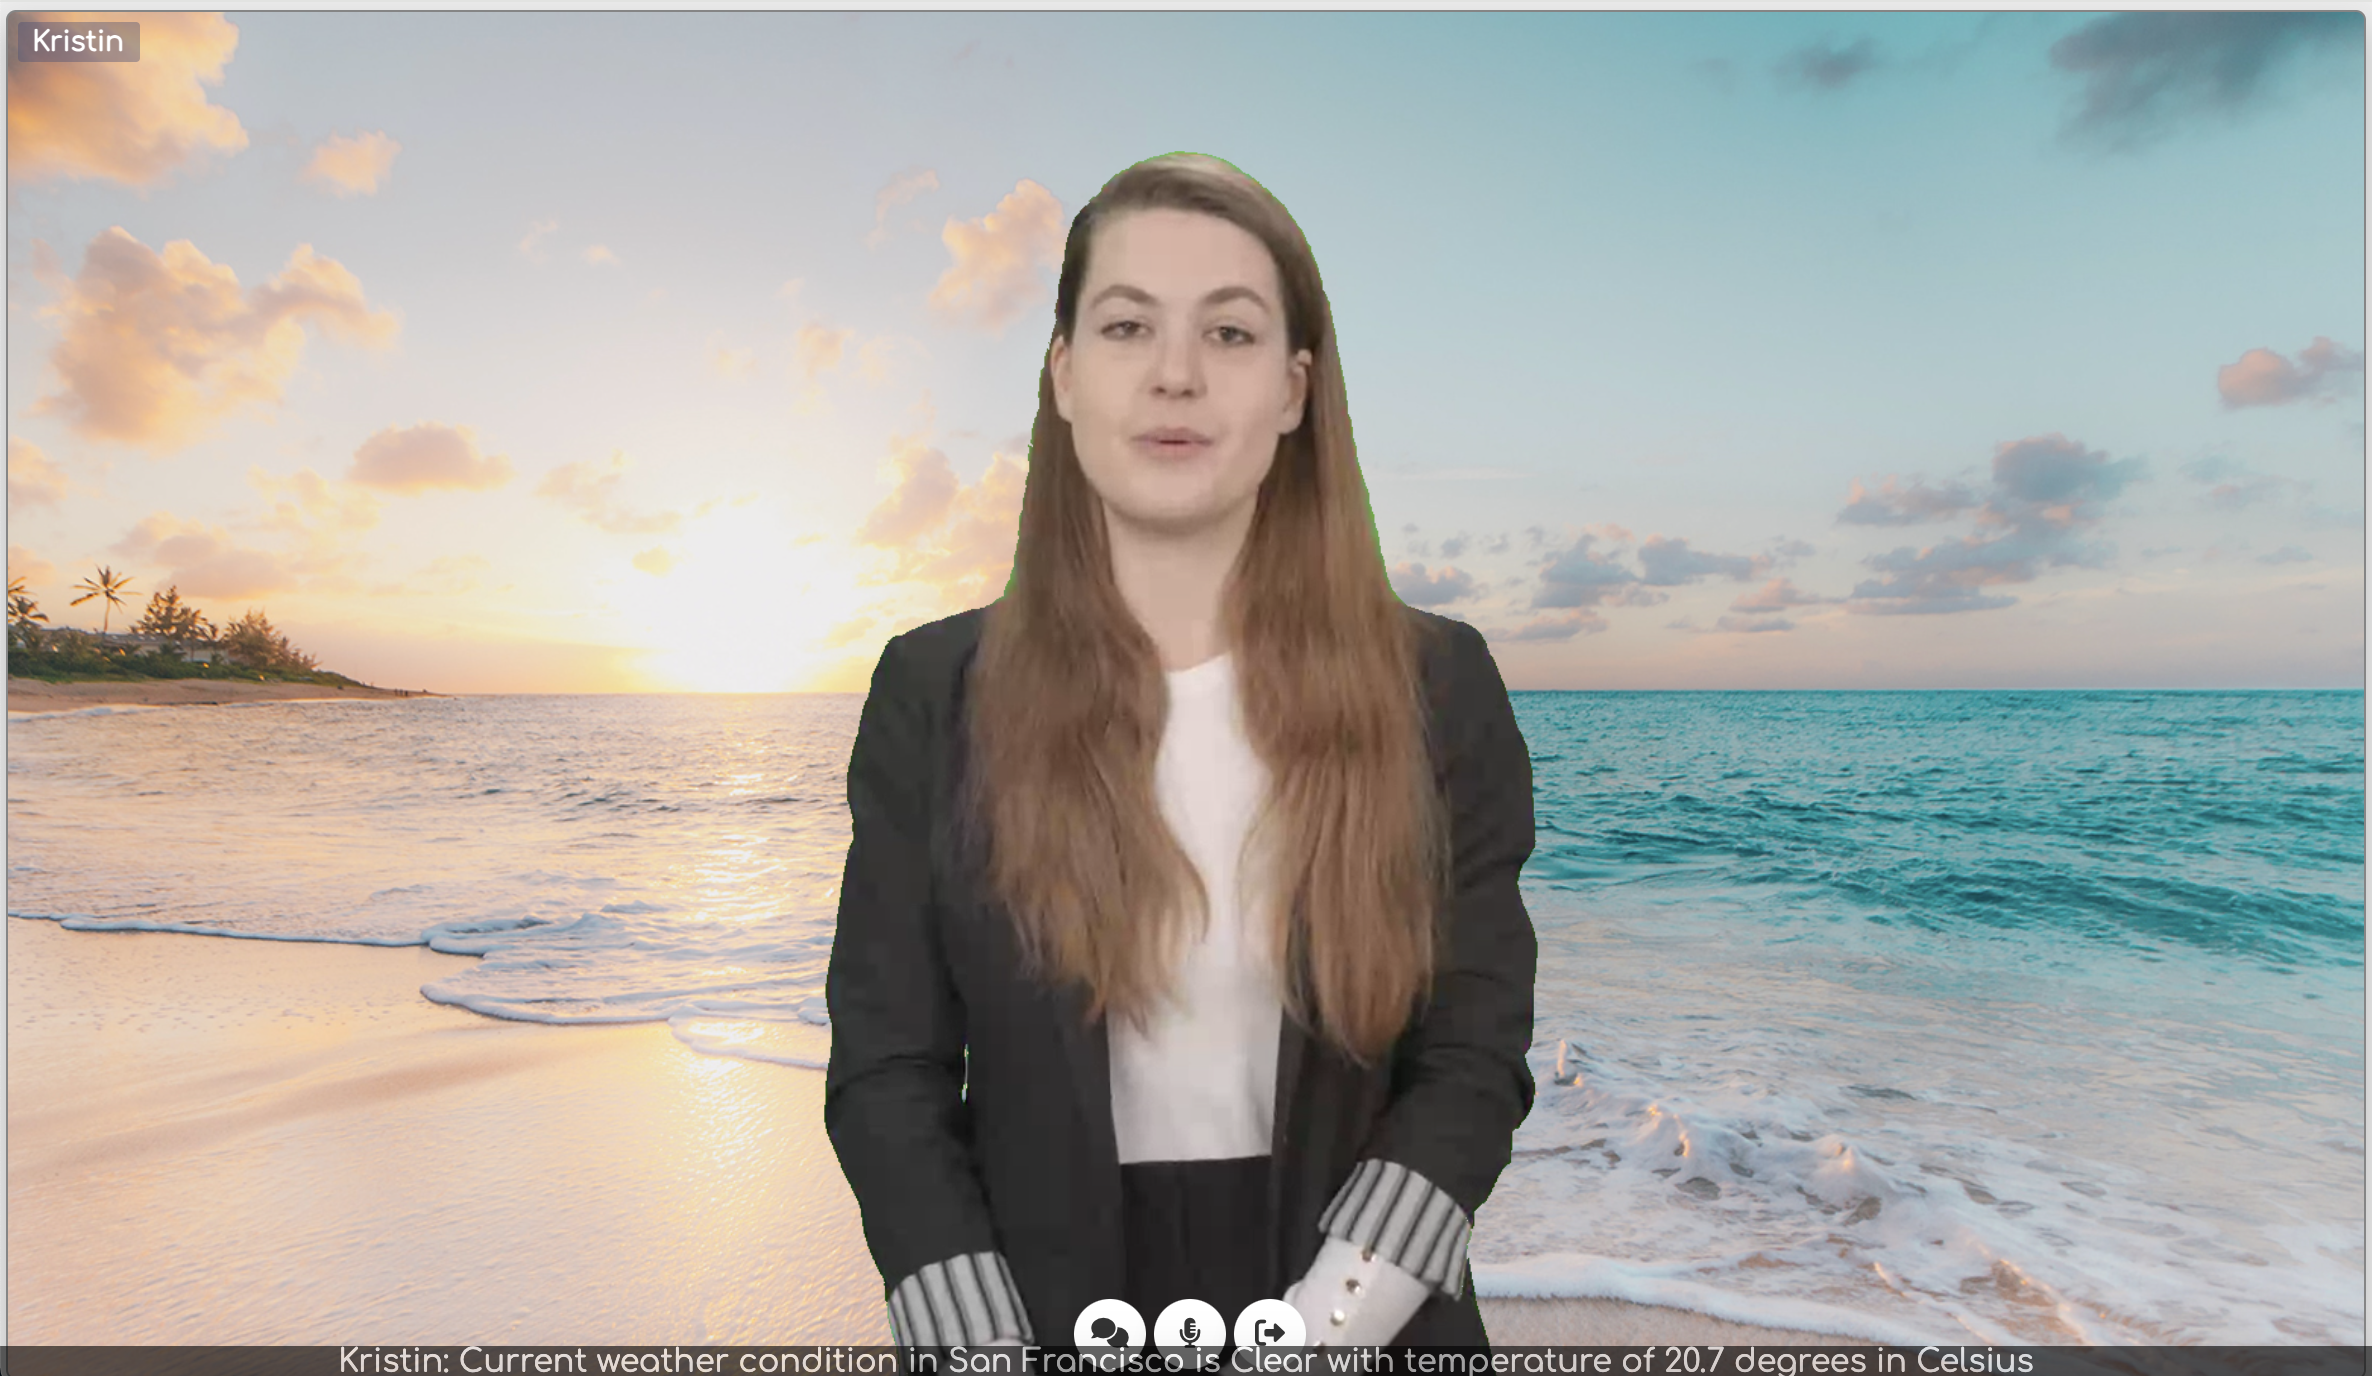
Weather assistant: Kristin gives local forecasts
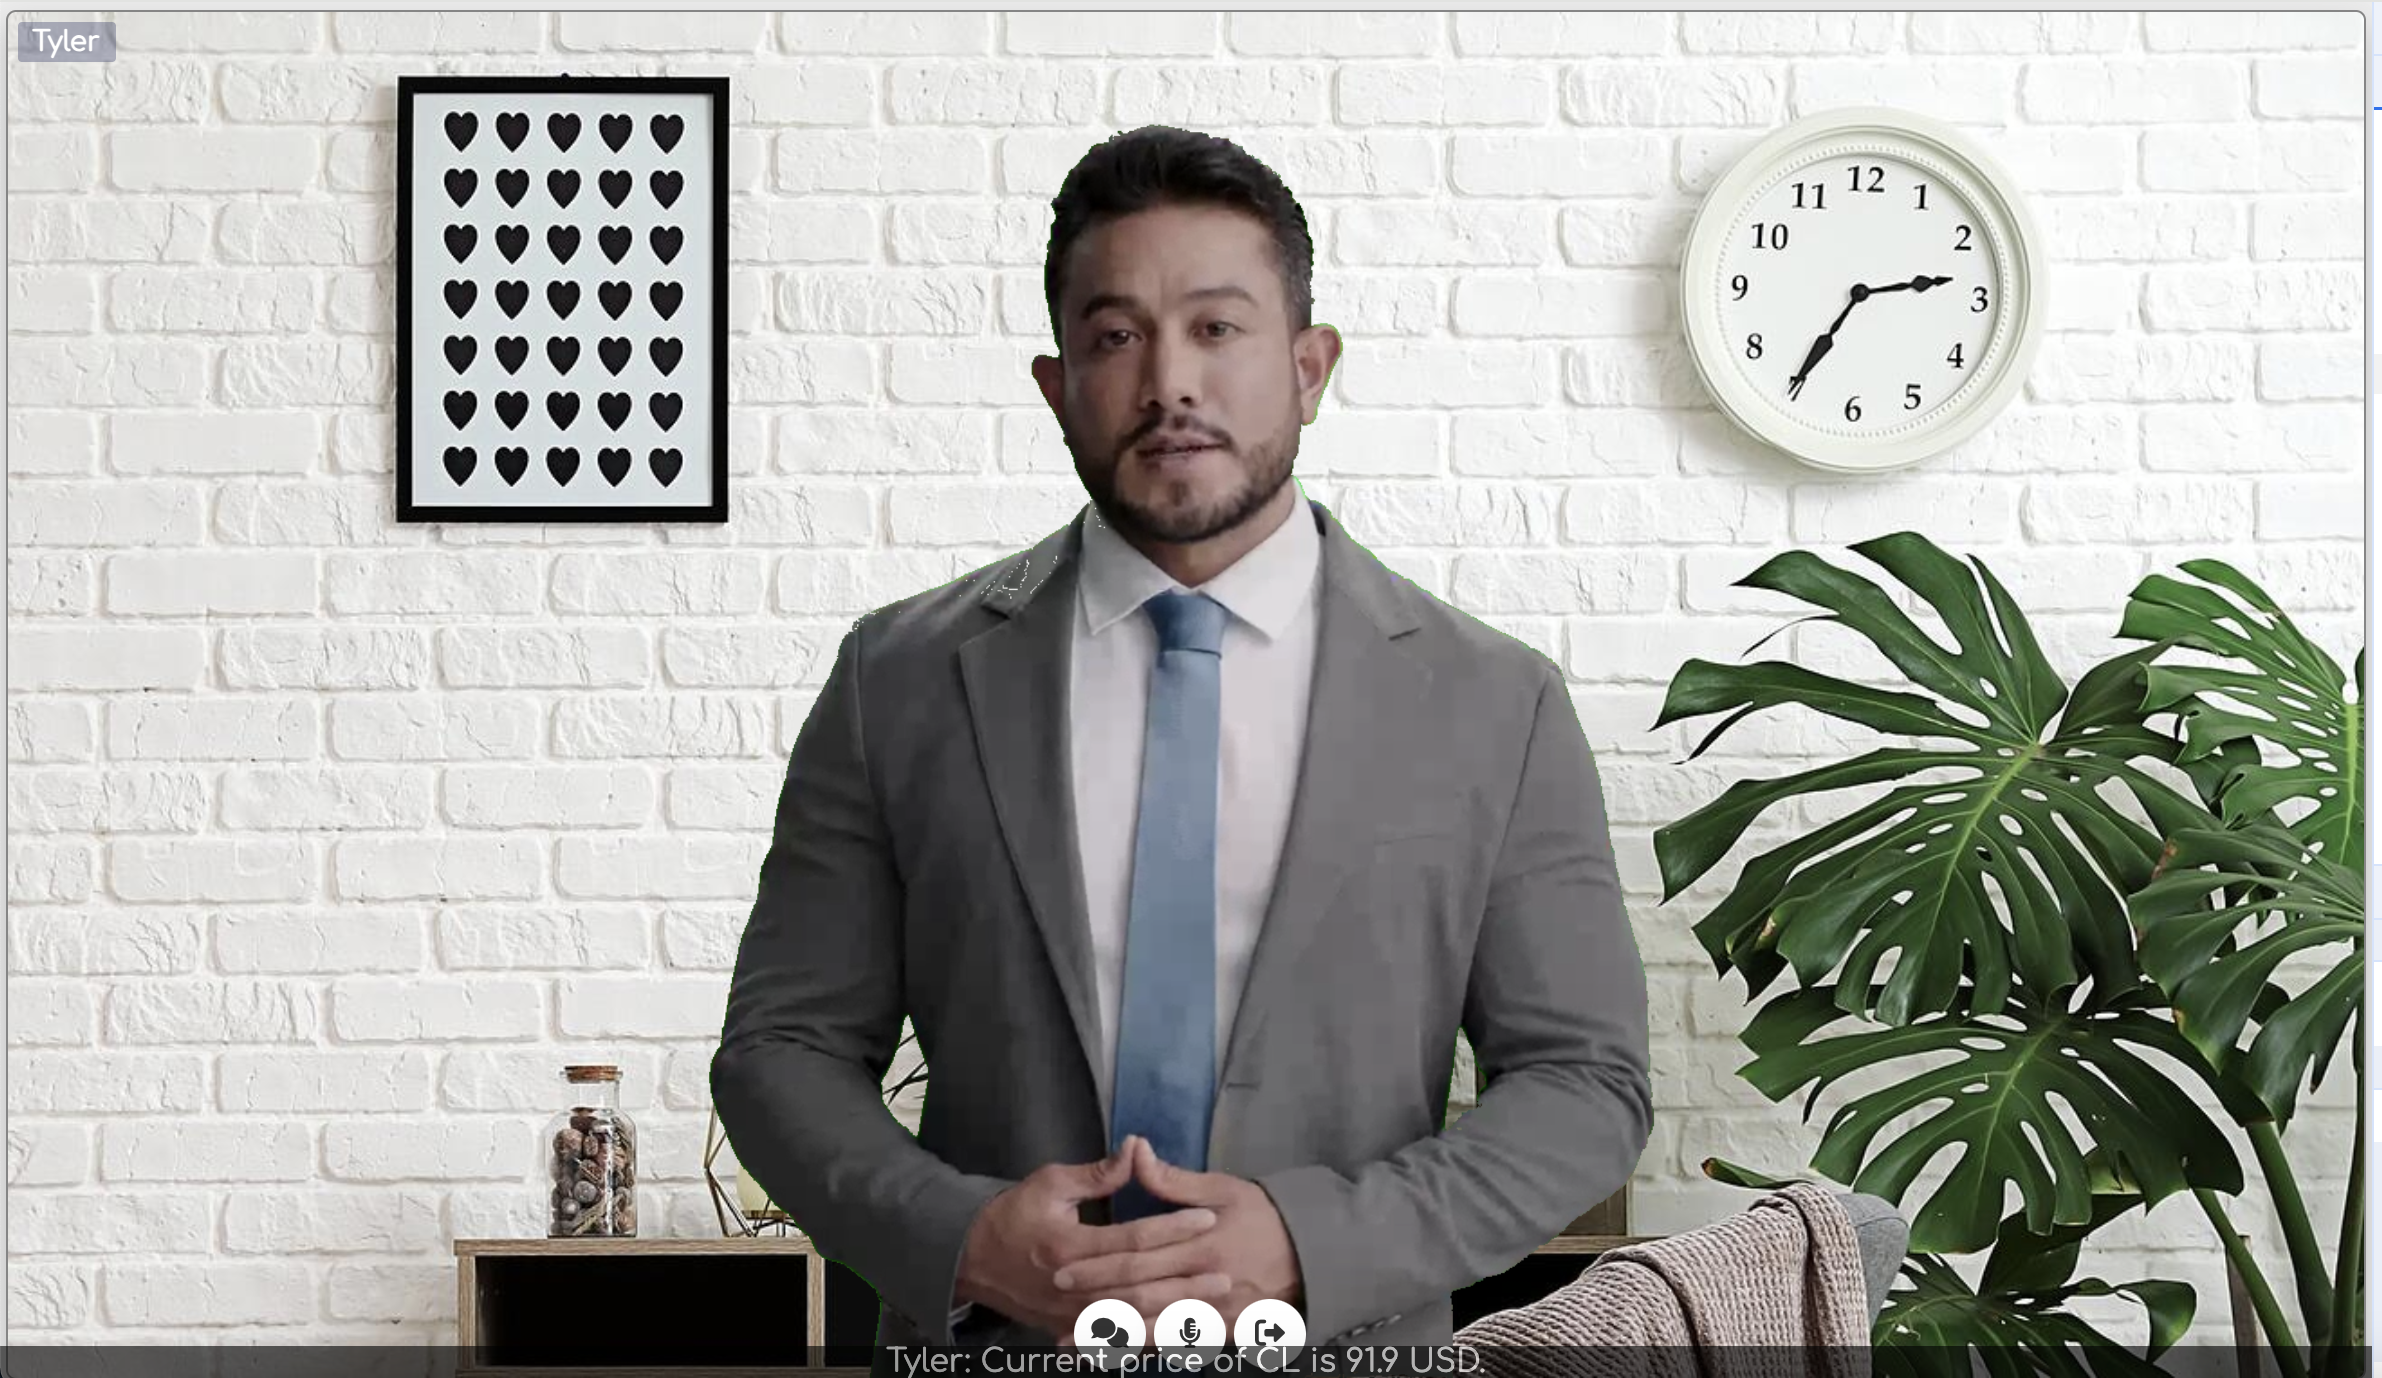
Stock prices: Tyler reports prices
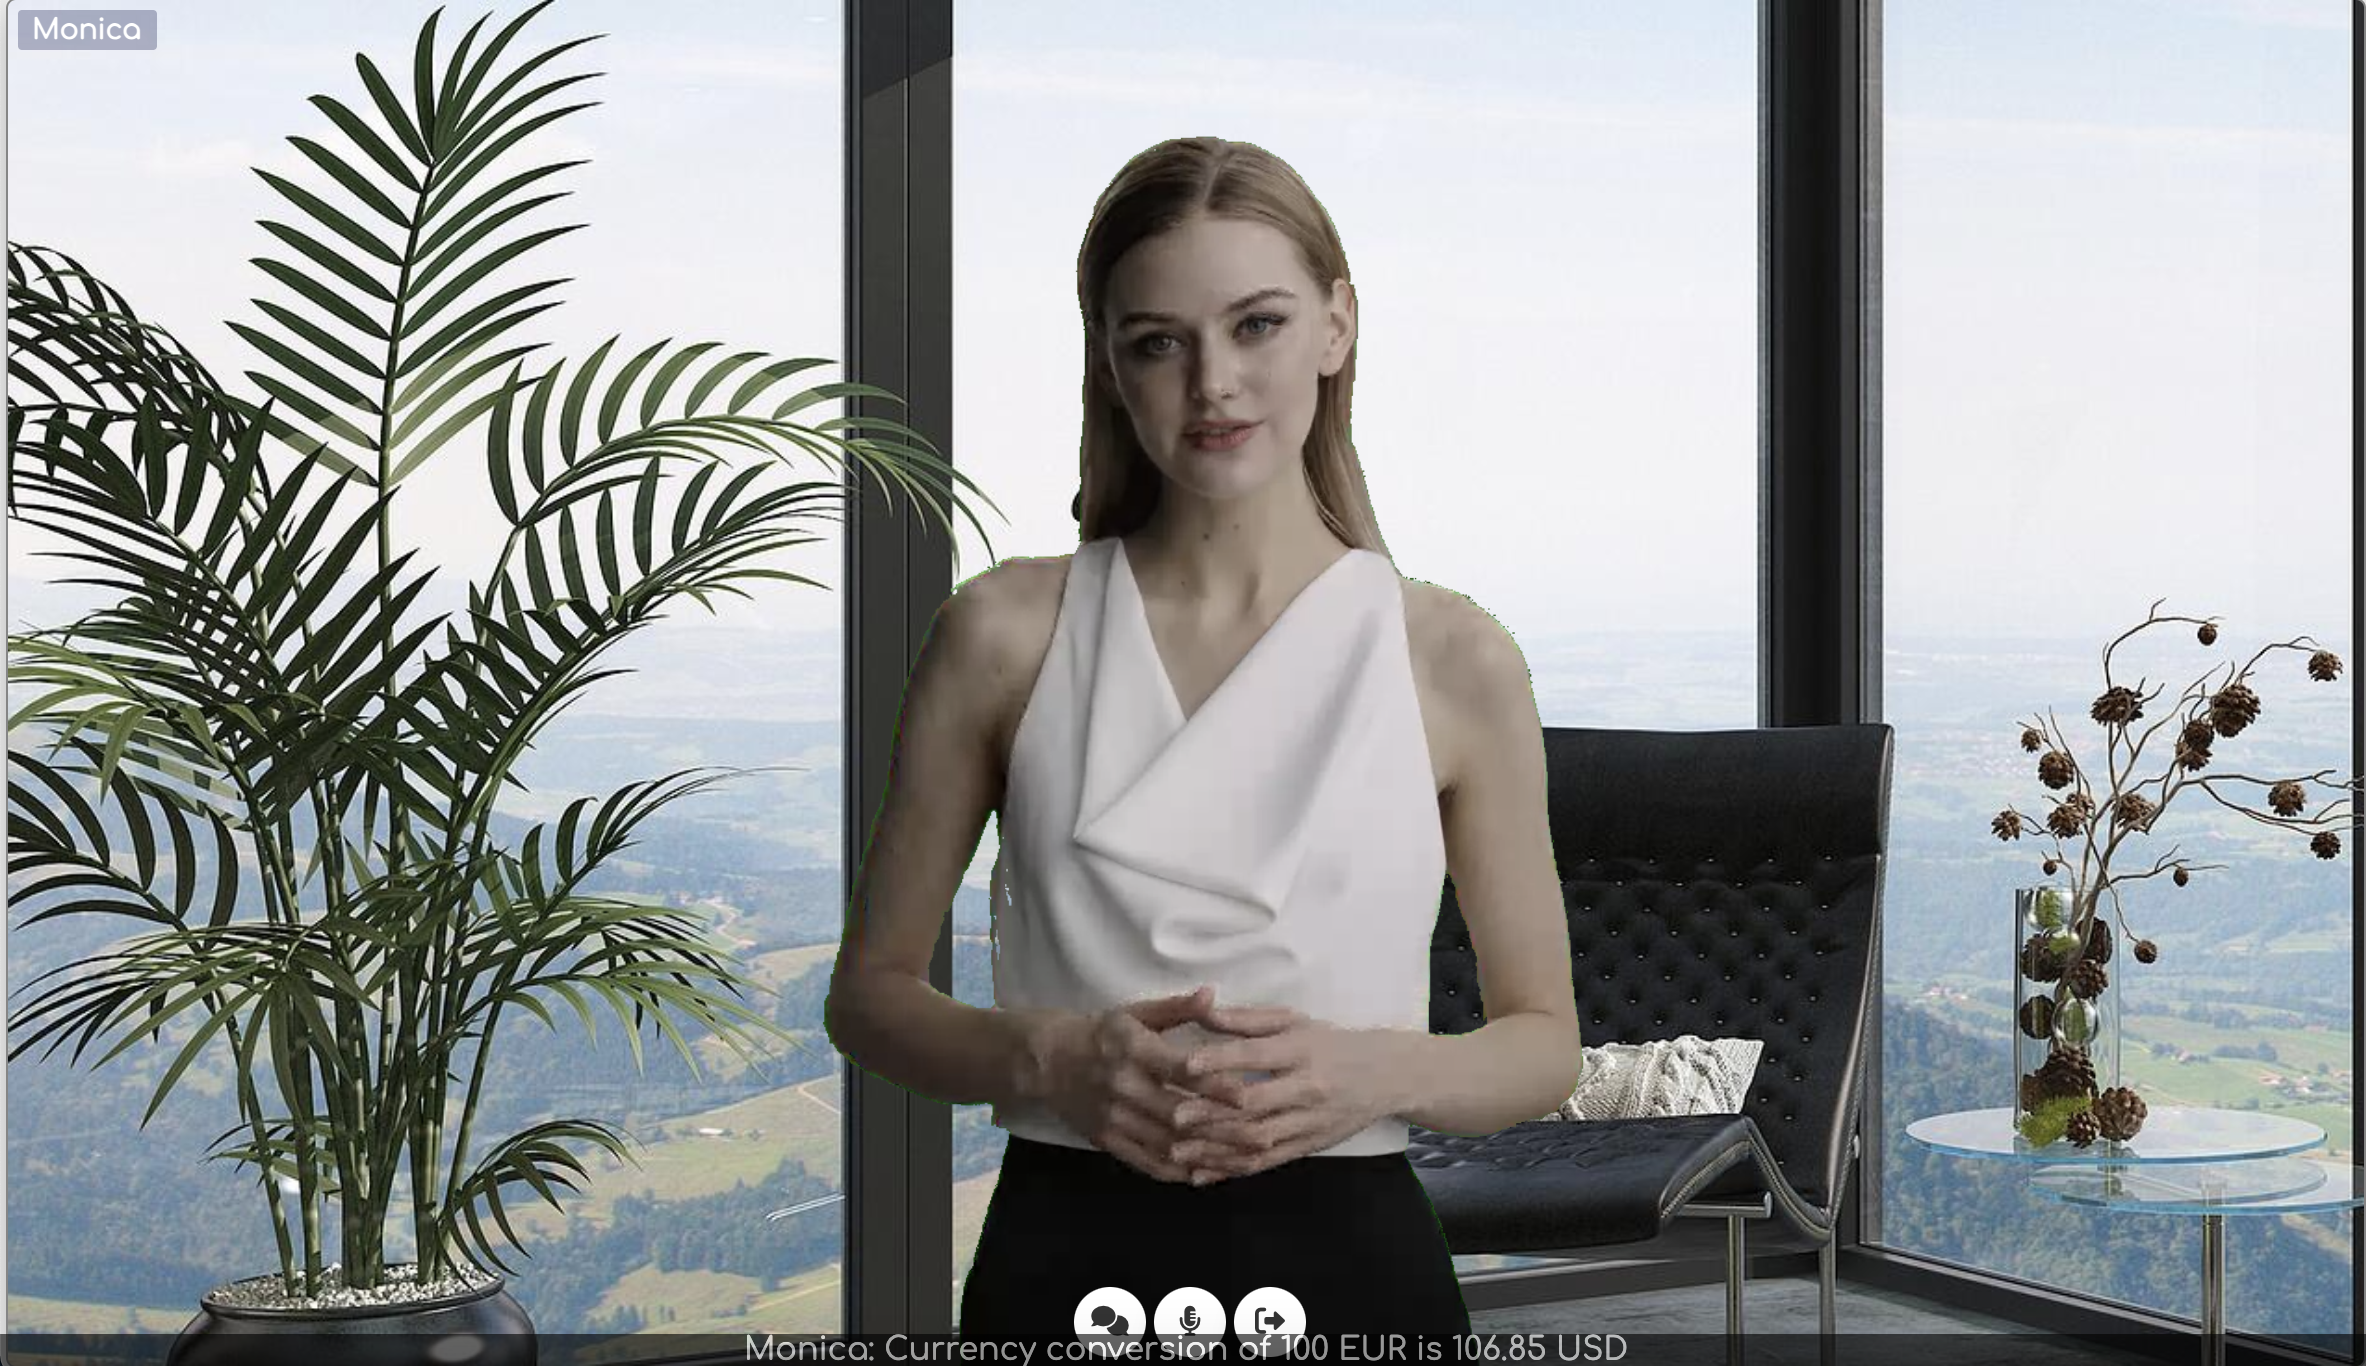
Currency conversion: Monica converts to USD
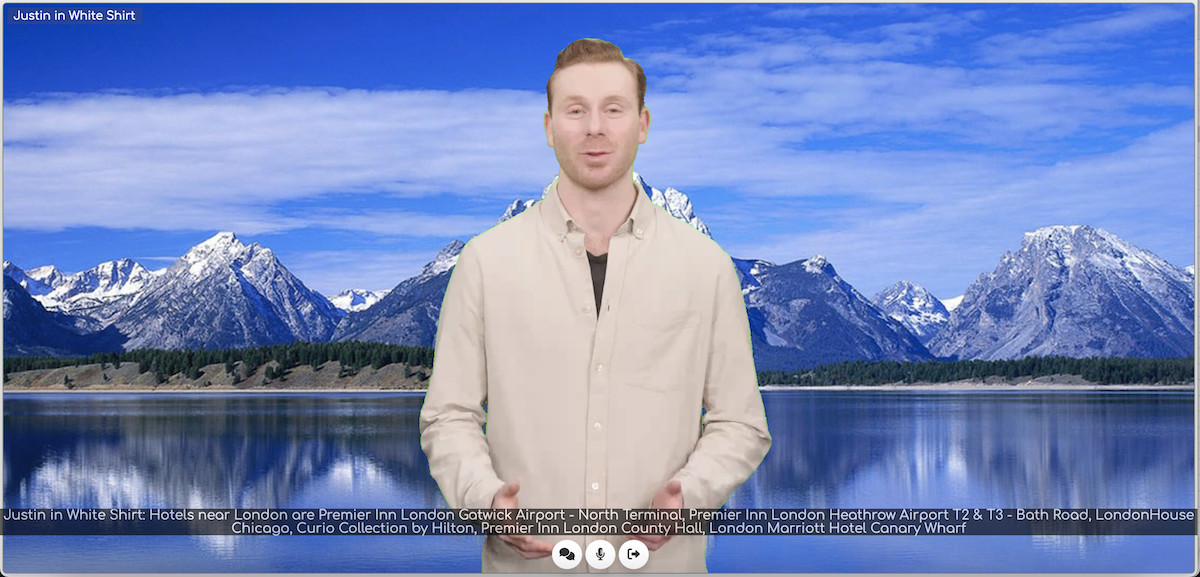
Hotel finder: Justin finds hotels
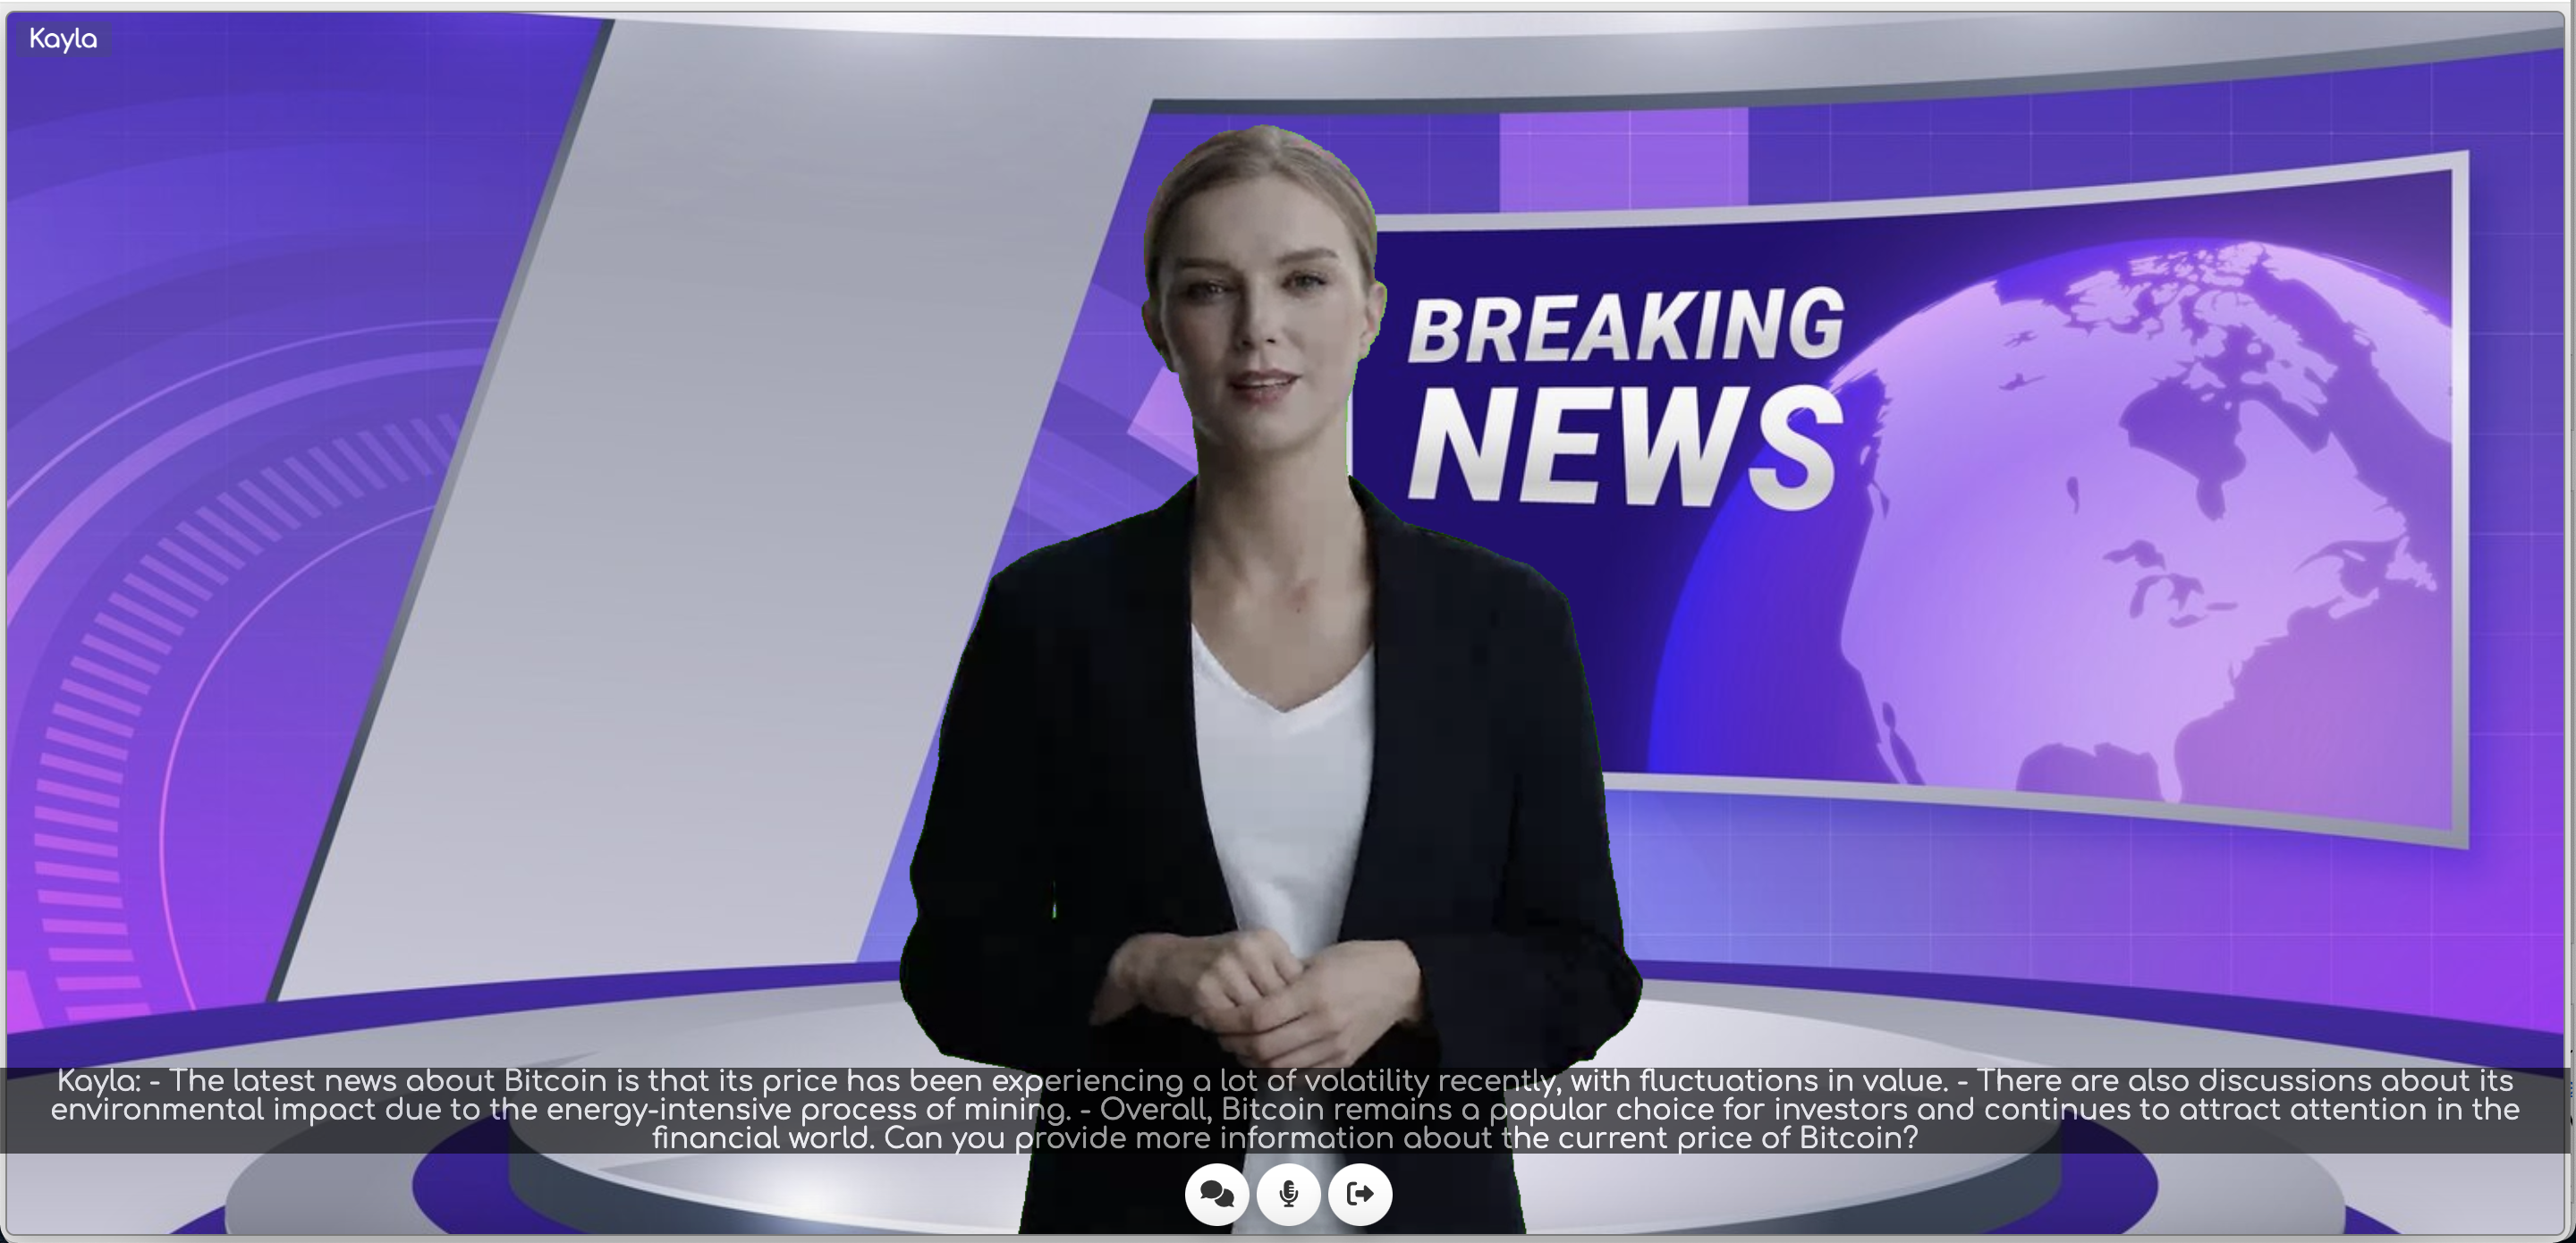
News feed: Kayla delivers the latest
General AI chat (no live data): Angela

Video tutorial
Requirements and installation
Server requirements
- PHP 8.1+ and MySQL
- Node.js v16+
- HTTPS recommended
API keys (choose what you need)
- Video avatars: LiveAvatar, legacy HeyGen and/or D-ID
- Audio-only avatars: ElevenLabs
- AI models: OpenAI, OpenRouter or Anakin
Installation
- Upload the files to your server and run the /install folder
- Open the Dashboard, log in with admin/admin, and activate with your CodeCanyon purchase code
How to get API keys
LiveAvatar (HeyGen)
- Go to https://liveavatar.com/
- Create your account
- Open API settings: https://app.liveavatar.com/developers. You can login here with your HeyGen account.
D-ID
- Go to https://studio.d-id.com/
- Use the trial token or upgrade your plan: pricing
- Generate your token: account settings
OpenAI
- Go to https://platform.openai.com/
- Create your account
- Generate a key: API keys
ElevenLabs
- Go to https://elevenlabs.io/
- Create your account
- Open API keys: settings
- Create an API key
OpenRouter (alternative to OpenAI / unfiltered models)
- Go to https://openrouter.ai
- Create your account
- Generate an API key in Settings → API Keys
- Create a Preset (e.g., Dolphin Mixtral) and add your system prompt
- Copy the Preset ID and use it in LiveSmart
Anakin (another alternative to OpenAI / unfiltered models)
- Go to https://anakin.ai/;
- Create your account;
- Upgrade your plan to paid one. API integration is available only to paid users;
- Generate a token from Personal -> Settings -> API Access Token. Please have in mind that this token will be visible only when you create it;
- Create an app. Go to App Studio and choose Create App. Give it a name and choose Chatbot. Choose the Dolphin Mixtral model and add your prompt there.;
- Click on the created App and choose the Integration tab. Get the app ID from there and use if for your meeting room;
Use cases
- Ecommerce assistant: Product details, availability, pricing, and recommendations
- First-line support: Answer FAQs, triage, and route issues 24/7
- Healthcare operator: Check availability and book appointments
- City guide: Upcoming events, attractions, and festivals
- Travel companion: Plan routes and find local spots
- Business assistant: Reminders and meeting info
- Airports and travel: Flight information and ticket help
How it works: train avatars for real data
- Persona and tone: Set avatar behavior and greeting, add quick-reply phrases
- Live data: Plug in “Advanced Tools” to fetch weather, news, booking, inventory, pricing, and more
- UX controls: Choose layouts, enable recording, schedule availability, and set exit behavior
User guide
Avatar behavior (tone and rules)
Use the “Avatar attitude” field to set persona, brand voice, and instructions. Example:
“You are a streaming avatar from LiveSmart, a company specializing in video communications. Your name is Monica. If asked, provide contact@livesmart.video. Keep answers brief and reply only to the latest question. If asked how this works, explain it’s a LiveSmart integration with HeyGen and OpenAI.”Greeting text and placeholders
Set a greeting in “The avatar will start the conversation with this text if provided.”
- Use placeholders:
Hello {{name}}, this is Angela and I will guide you today. - Add chat instructions with “|” separator:
Hello {{name}}, this is Angela. Please open the chat for more instructions|This text will appear in the chat
Predefined phrases
Add comma-separated suggestions to appear in chat. See the main demo and YouTube demo for examples.
Layout options
- Normal: Avatar centered, full-screen (see main demo)
- Content-oriented: Avatar fixed top-right with chat below; use main screen for content (see Weather and YouTube demos)
Recording
Allow participants to record meetings if enabled in Dashboard → Rooms → AI Avatars → Room Settings. Recordings are visible to admins and tenant admins.
Scheduling
In Dashboard → AI Avatars → Advanced options, schedule by date/time or limit session duration. If only duration is set, the meeting will be limited to that time.
Exit behavior
Choose where users go after ending: home, entry form, or any URL.
Subtitles
Enable or disable subtitles (enabled by default).
Host video
Allow the host to join with video.
Voice speed
Adjust the avatar voice speed with the slider.
Advanced Tools (function calling)
Connect live data via
server/callTools.php. Example:- Function:
getCurrentWeather - Description: Get the current weather in a given location
- Parameters:
location,unit(unit optional; Celsius/Fahrenheit)
Add these in Dashboard → Rooms → AI Avatars → Advanced Tools. The description helps the AI decide when to call the function (e.g., “What’s the weather in San Francisco?”).
Sample API calls documentation: https://www.new-dev.com/videoaidoc/OpenRouter or Anakin models (optional)
Use OpenRouter to access models like Dolphin Mixtral, Gemini, Copilot, DeepSeek, and more.
- Create a Preset with your system prompt and copy the Preset ID
- In the LiveSmart Dashboard, check “Remove filter and allow usage of not moderated chat” and paste the Preset ID
- You can also use any model ID from the available models page (e.g.,
openai/gpt-3.5-turbo)
Docs: https://openrouter.ai/docs/quickstart
Another option is using Anakin.ai
After you create the account, have the token and upgrade your plan, you need to create an app. Go to App Studio and click on Create App:
Then choose the Dolphin Mixtral model (actually you can choose any model including Gemini, Copilot, DeepSeek, etc) and set your desired prompt:
Choose the App ID from the Integration tab of the created Chatbot:
In order to activate the not moderated version of LiveSmart, you need to check “Remove filter and allow usage of not moderated chat” from the Dashboard and fill in the application ID you already have:
For more information about using the Anakin.ai, please read the documentation page.
Predefined assistants (OpenAI)
Create an Assistant in your OpenAI dashboard (upload files, add instructions) and assign it to an avatar in LiveSmart (Rooms → AI Avatar → Predefined Assistants).
Embed in any website
Use the iframe snippet below to embed an avatar anywhere:
<iframe id="lsv_iframe" src="YOUR_AVATAR_PAGE" allow="camera; microphone; fullscreen; autoplay; encrypted-media;" style="background-color:#ffffff; padding:0; margin:0; border:0;" width="100%" height="600">WordPress integration
A WordPress plugin is included. It adds the LiveSmart Dashboard to your admin panel and provides a shortcode:
[livesmart_ai_widget room="NAME_OF_THE_ROOM"]Monetization (SaaS)
LiveSmart includes a SaaS/monetization module from v1.0.6. Learn more: https://livesmart.video/knowledge-base/livesmart-ai-monetization/
Frequently asked questions
What are the limits of LiveAvatar’s free API?
The LiveAvatar free plan is designed as a trial to test integrations and capabilities. It has strict usage and technical limits compared to the paid tiers.
Core Usage Limits
Monthly Credits: You receive 10 free credits per month.
Total Streaming Time: These credits typically allow for 5 to 10 minutes of total streaming, depending on your integration method.
Session Duration: Each live session is capped at a maximum of 2 minutes.
Concurrency: You are limited to 1 concurrent session, meaning only one person can interact with the avatar at a time.Feature & Quality Restrictions
Watermark: All free streams include a visible watermark.
Avatar Selection: You have access to the full library of 1080p public avatars.
Custom Avatars: Creating and using Custom LiveAvatars (Digital Twins) is not allowed on the free plan; these are reserved for paid users.
Integration: You get full access to the API and Web SDK to test how the avatar fits into your own application or website.What is the difference between LiveAvatar and HeyGen?
LiveAvatar is a specialized spinoff of HeyGen dedicated exclusively to real-time interaction, while the core HeyGen platform is built for creating pre-recorded videos.
Here are the primary differences:1. Purpose and Usage
HeyGen (Core): Designed for generating high-quality marketing videos, tutorials, and presentations. You input text, and the platform renders a video file for you to download or share.
LiveAvatar: Built for instant, two-way conversations. The avatar “listens” and responds in real-time with low latency, making it ideal for live customer support, virtual assistants, or AI-driven coaching.2. Platform and Technology
Separate Environments: Although developed by the same team, they operate on different platforms. LiveAvatar is the official production version of what was previously “Interactive Avatar” in HeyGen Labs.
Architecture: LiveAvatar uses a new architecture optimized for WebRTC streaming to ensure smooth, responsive dialogue, whereas standard HeyGen is optimized for high-definition video rendering.3. Subscription and Pricing
Independent Plans: A standard HeyGen subscription does not automatically include LiveAvatar access.
Cost Structure: LiveAvatar uses its own credit system. For example, the Essential Plan ($100/mo) provides credits that translate to roughly 500 to 1,000 minutes of live streaming, depending on the integration method. Standard HeyGen plans focus on “credits per minute of generated video”.What are the limits of D-ID’s trial API?
14-day trial. Pricing: https://www.d-id.com/pricing/api/
Is OpenAI free?
No. You pay per model and token usage. Pricing: https://openai.com/api/pricing/
How do I get HeyGen paid API credits and more avatars?
Purchase credits here: https://labs.heygen.com/interactive-avatar (see “purchase API Credits”). Paid API plans start at $99/month (Pro).
How can I train avatars?
- Simple: In the Dashboard, use “Avatar attitude” to define persona, behavior, and provide your domain knowledge.
- Advanced: Add your functions in
server/callTools.phpand define them in Advanced Tools (function, description, parameters). Examples:- Weather:
getCurrentWeather(location, unit) - Booking flow:
getAvailableTimeslots(...)→bookTimeslot(email, name, timeslot)
Docs: https://www.new-dev.com/videoaidoc/
- Weather:
- OpenAI Assistants: Create an Assistant in OpenAI and assign it in Rooms → AI Avatar → Predefined Assistants.
Can I use OpenAI gpt-4o or gpt-5o?
Yes. Please check model pricing: https://openai.com/api/pricing/
The mic icon does nothing on iPhone Safari/Chrome
Make sure Dictation is enabled: Settings → General → Keyboard → Enable Dictation. More info: Apple guide.
If the avatar page is embedded in an iframe, include permissions:<iframe id="lsv_iframe" src="YOUR_AVATAR_PAGE" allow="camera; microphone; fullscreen; autoplay; encrypted-media;" style="background-color:#ffffff; padding:0; margin:0; border:0;" width="100%" height="600">Can I integrate LiveSmart AI into other platforms?
Yes. A WordPress plugin is included with a shortcode:
[livesmart_ai_widget room="NAME_OF_THE_ROOM"]
Or embed via iframe (see snippet above).Rooms show 404 or “not found”
This usually indicates missing rewrite rules.
- Apache: Ensure
.htaccessis present andmod_rewriteis enabled. - Nginx (443):
location / { rewrite ^/(\w+)$ /pages/p.php?short=$1 last; } - LiteSpeed:
RewriteEngine On RewriteRule ^([\w\s-]+)$ ./pages/p.php?short=$1 [L,QSA] - IIS: Import
.htaccessrules via Microsoft guide:
documentation
Get started
Install LiveSmart, connect your API keys, and launch your first AI video agent today. Activate with your CodeCanyon purchase code and start converting more visitors with human-like AI conversations.
KeymasterAll LiveSmart Products use following software stacks:
- The front-end is following best practices in HTML and CSS formatting and is using plain bootstrap 5 and notyf notification system;
- JavaScript files are according to ECMAScript standards and are using default listeners and events ;
- Concept, workflow, button arrangement and color scheme are the same and are used in all LiveSmart products;
- Photos and backgrounds are purchased from Depositphotos and banners are designed by Victoria Borissova;
- Dashboard is from free bootstrap resource;
- Chat concept is from bootstrap sample pages;
- Icons are fontawesome;
- The design of this page is using Naxos themeforest theme.
LiveSmart Server Video is based on:
- Core server is mediasoup media server, WebRTC SFU (Selective Forwarding Unit) for Node.js. LiveSmart uses the structure of main example site and this example git resource;
- Core whiteboard functions are taken and modified from here;
- Virtual background facility is using Tensorflow and Bodypix libraries;
- Avatar pre-defined images are designed by studiogstock / Freepik;
- Color picker in the Dashboard is https://coloris.js.org;
LiveSmart AI Video (PHP or Node.js) uses:
- Backend uses HTTP POST and GET requests to HeyGen, OpenAI, ElevenLabs and Anakin.AI APIs;
- News background is from FreePik;
- Sample functions use calling the following APIs for news, weather, prices, currency conversion, hotels and background changes;
KeymasterSummary
LiveSmart Server Video offers the possibility to monetize incomes by enabling subscriptions for LiveSmart customers and using it as SaaS. Customers are organized in tenants, or semantic organizational structures with own configuration, branding, logo and user interface. One tenant can be any client of LiveSmart owner or different departments. For example LiveSmart can have several tenants – company1, company2, company3 – and each of them can have many users sharing own configuration, branding and payment plan. Monetization functionality is available for customers with Extended license.
Payment and subscription
Owner of LiveSmart can enable or disable subscriptions globally for the site and set different tenants to be paid. Also can set different payment plans with different time intervals and prices and check payment subscription history. Subscriptions can be paid by using the most popular payment gateways – PayPal, Stripe and Authorize.net. By default payment is set to test mode. Also payments are not recurring. Subscription is a one time payment and when is due to expire, tenant admin will receive a notification email. Body, title and notification days are configurable.
– how to set up a PayPal account. Check this tutorial on how to create ClientID and SecretID
– how to set up a Stripe account. Check this tutorial on how to create publishable API keys for Stripe:
– how to set up an Authorize.net account. Check this article on how to obtain Login ID, Client ID and Transaction Key.
Branding
Each tenant can setup own branding for both administration and video panels – logo, look&feel, page title and wording. Each tenant can have own styling file and possibility to edit the tenant UI:
Tenants, organisers (hosts) and users
Owner of LiveSmart is the super administrator. He can add hosts, organized in tenants and can set a tenant admin. Tenant admin is responsible for payments and will receive notification emails when subscription is due to expire. Each tenant has their own chat and recording history and can set up their own users. Users in terms of LiveSmart are the non anonymous visitors. For example if a host wants to set up a room that is private, this can be done in two ways – by setting a global password for the room and all attendees need to know it in order to do video, or add multiple users with usernames and passwords.
Demo
You can login to the demo dashboard to test the subscription functions. There are two accounts with enabled payment: admin tenant with paytestadmin/paytest and regular user paytest/paytest. Admin tenant can also check tenant recordings, chat history, manage other organisers and users of the tenant.
KeymasterThis is a demo page, where you can see how LiveSmart Server Video voice to text and translation module works. This functionality works only with desktop and mobile Chrome browsers.
In order the demo to work, and there is no echo and overload, you should do this on different devices and not close one to another.
1. Choose the agent language from the list
and open the agent link
You will see the initial entry form. By providing a common name, you can enter the room as room owner.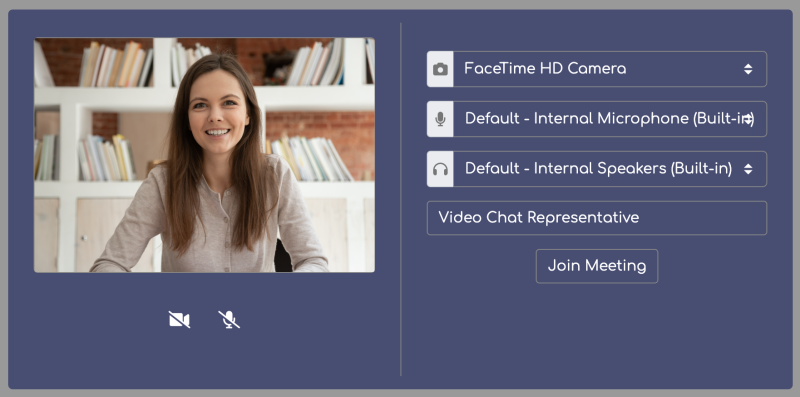
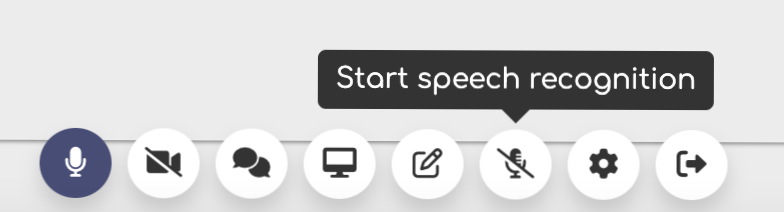
When the meeting starts, you need to enable speech recognition and translate from the icon:
2. Choose the attendee language from the list
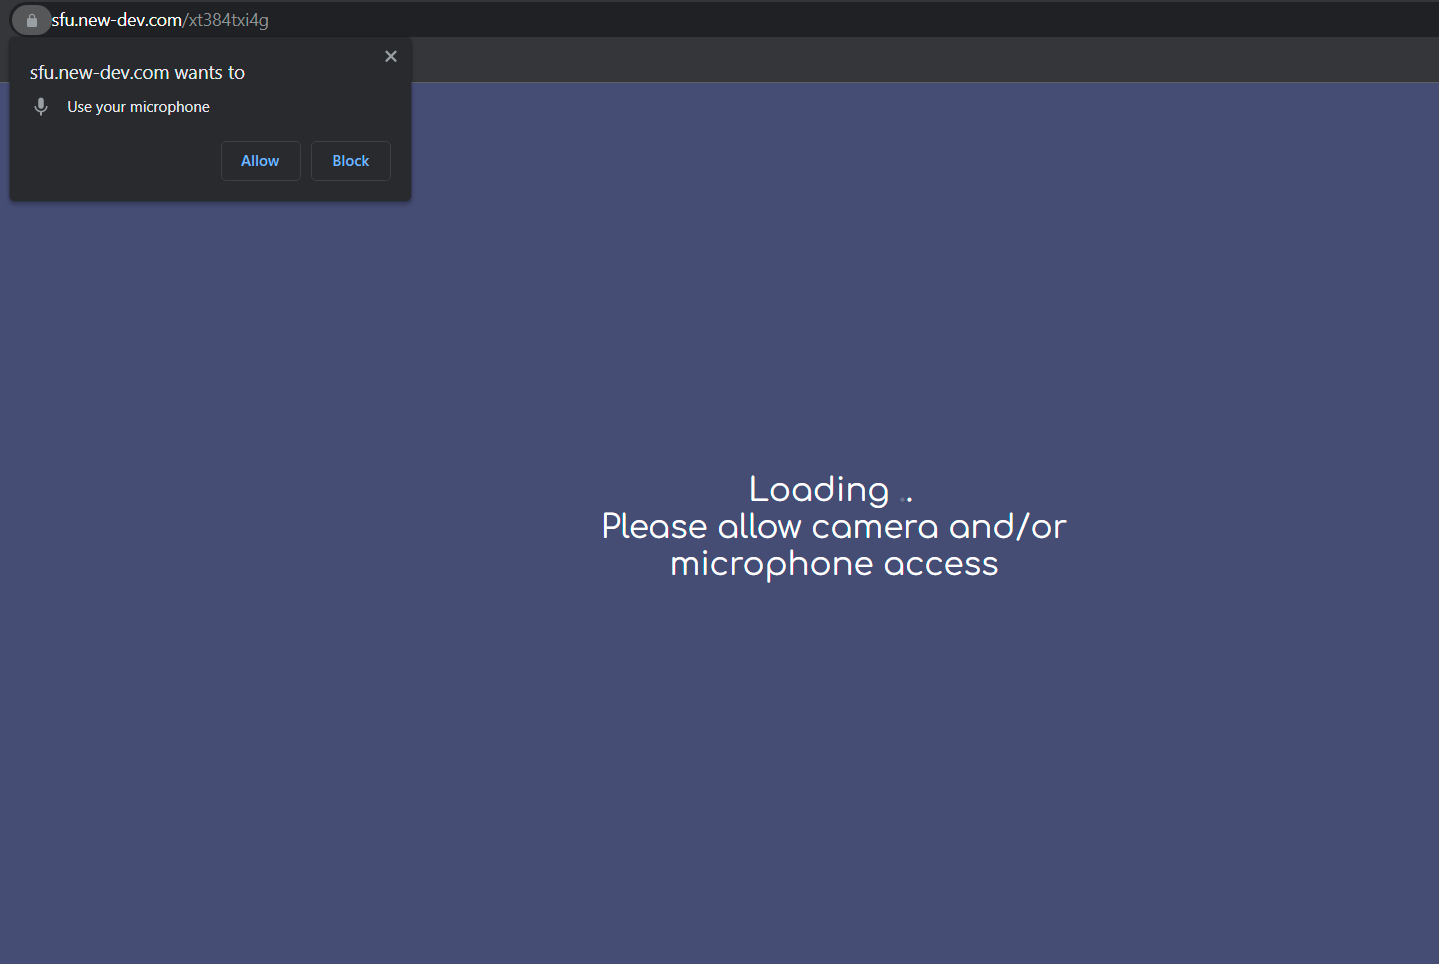
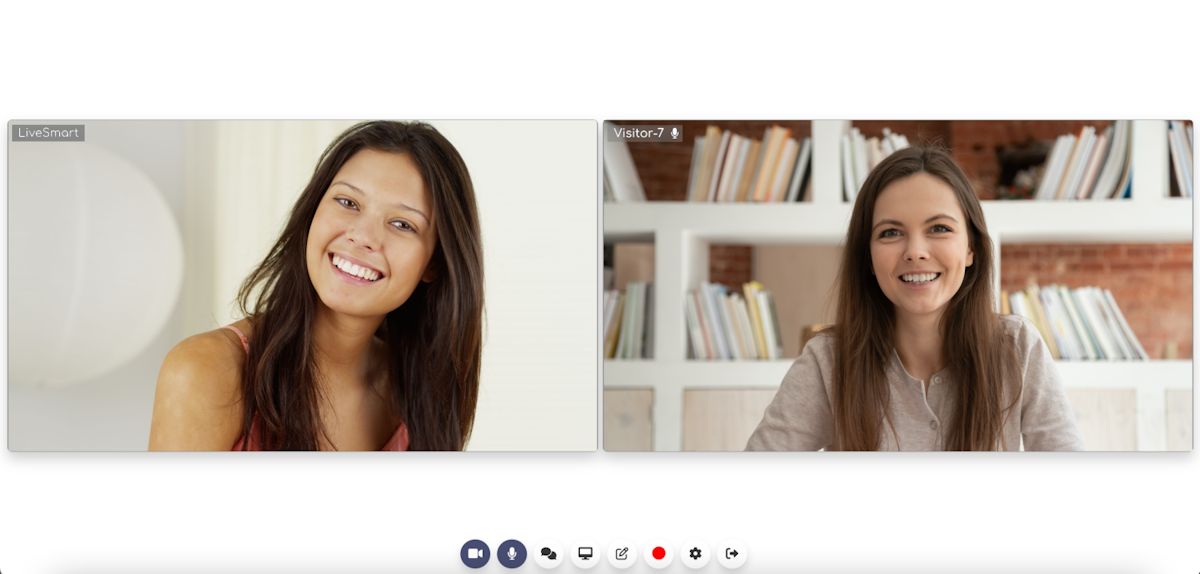
Click this attendee link to copy it in the clipboard and send it to a new device so there is no echo. The attendee should see subtitles in his language while the agent is speaking. His voice on the other hand will be translated to the agent language.WARNING! Please note that you have to allow your browser to access camera and/or microphone in order the video chat to work.
In order to reduce the echo if you are on the same machine, you can mute microphone or lower the volume. For optimal demo results it is good to use two different devices.
LiveSmart can be legally purchased only from CodeCanyon. If you have obtained the software from another source, you face the risk of it not working properly, or to have inclusions that may harm your system.
KeymasterMeeting Room
LiveSmart Server Video is a video chat between an organizer and one or more (theoretically unlimited number) attendees. The organizer role can be performed by tutor, doctor, support personnel, real estate agent, car reseller, registered user in a social media, etc
In order a call to be performed, both parties need to be online in one room. You can generate rooms for your customers in a couple of ways:
– Generate a room from the Dashboard page. You can add room ID, visitor name (if you are expecting someone to come), protect the room password if you want this room to be protected and organizer name;
– Make the link to be dynamically generated by your system;
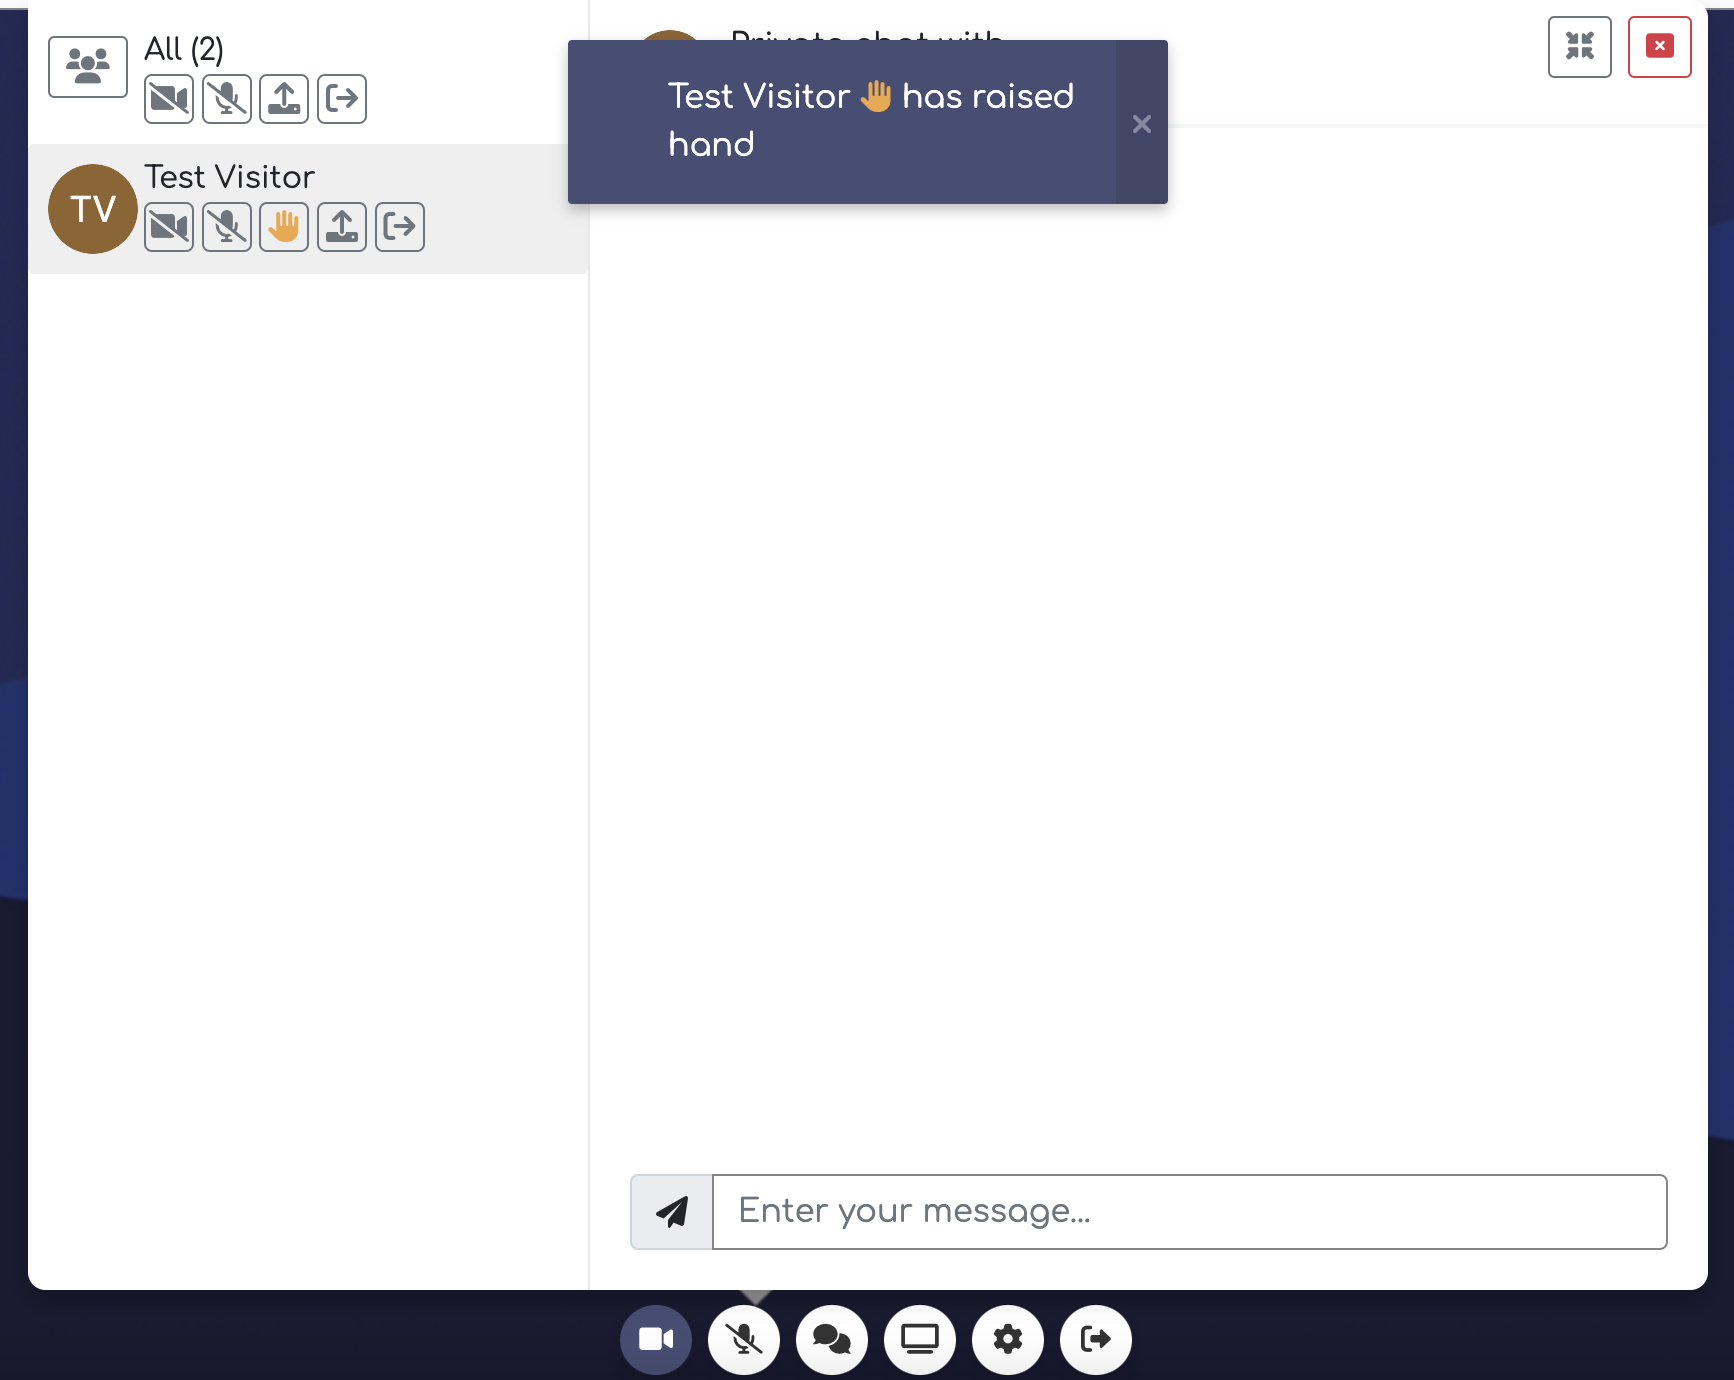
When you enter a meeting the first time and if attendee names are not defined, you will be prompted to provide a name. After that you need to grant permissions for camera and/or microphone.When the meeting starts attendees can chat, toggle video or audio, draw on the whiteboard, transfer a file, do a screen share or take a snapshot* of the other party video screen. Also the organizer can perform attendee management like mute, block, respond to raised hands.
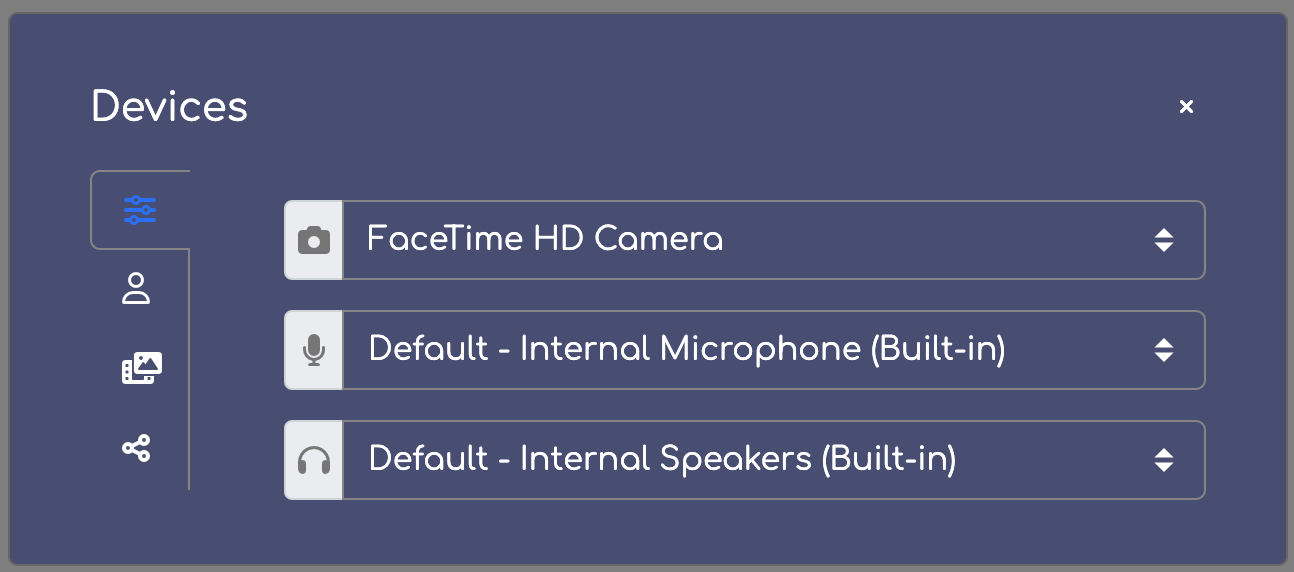
From the inline meeting settings an organizer can choose video/input and output devices. From the second tab, you can go full screen (the whole window), raise a hand, manage the participants and lock the room. Third tab is for recording. Here you can start/stop or pause a recording. Next is the option to start broadcasting a video from YouTube. Last one is a Share button, from where you can scan a QR code, copy the URL of the meeting or send it directly to an email.
From the inline video session window an organizer can mute an attendee. Also all the participants can take snapshots or go fullscreen.
Screen Sharing
You are able to share the whole screen, separate application or a browser tab if your browser is Chrome 72+, Firefox 52+ or MS Edge 17+.
Whiteboard
Whiteboard feature allows you to show your visitors some drawings, diagrams, images or links. It is enabled by default . You can disable it from the dashboard.
It can be started from chat screen by clicking on the Whiteboard icon. You can do this while in call.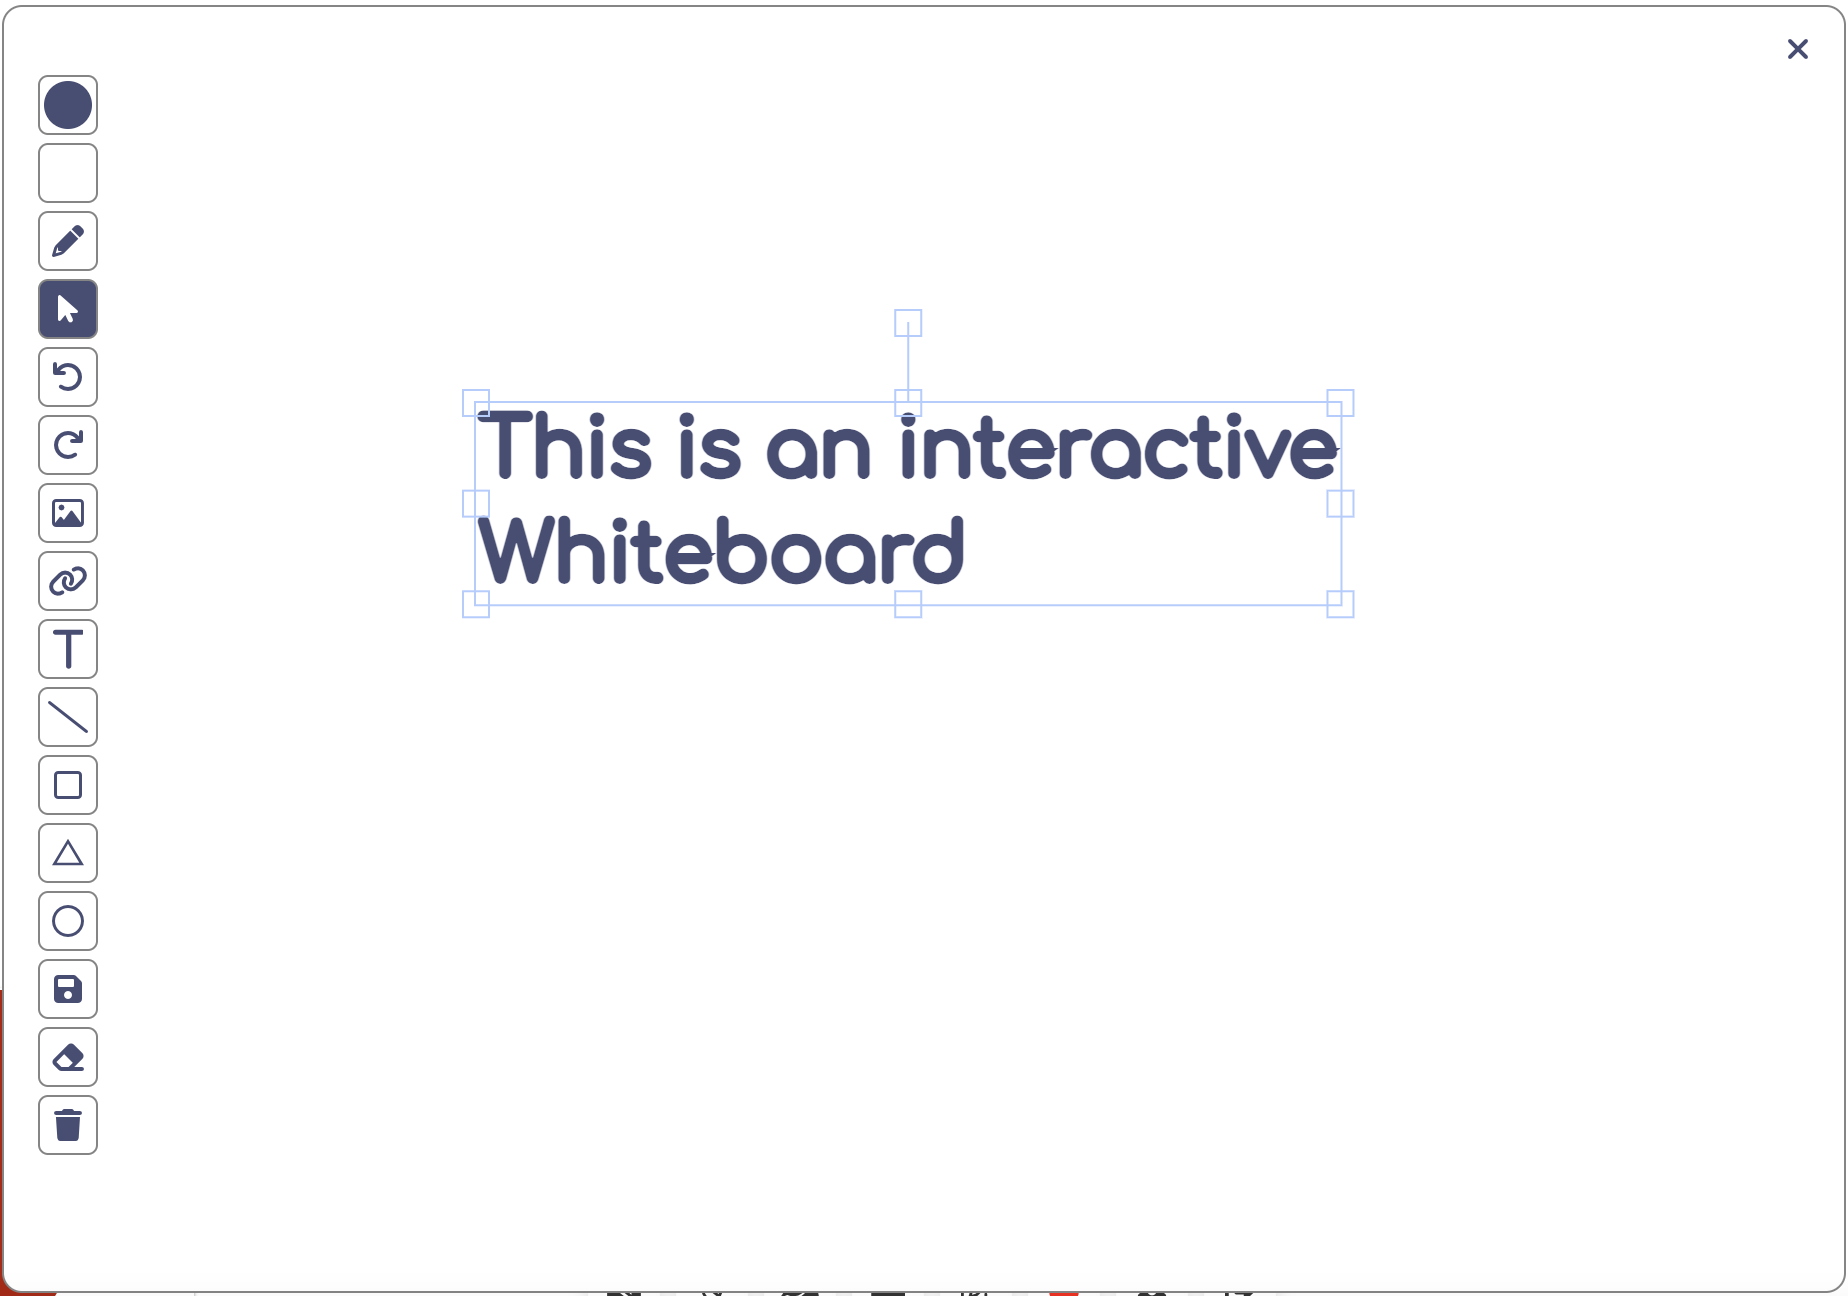
Recording
You can record your whole screen from the Settings button -> Recordings
Broadcast
There is one or more broadcaster and many viewers. This is a perfect tool for online lecturers and enterprises.
From the dashboard you can start a meeting and check “Attendees will start audio and video disabled” in the Room management section.
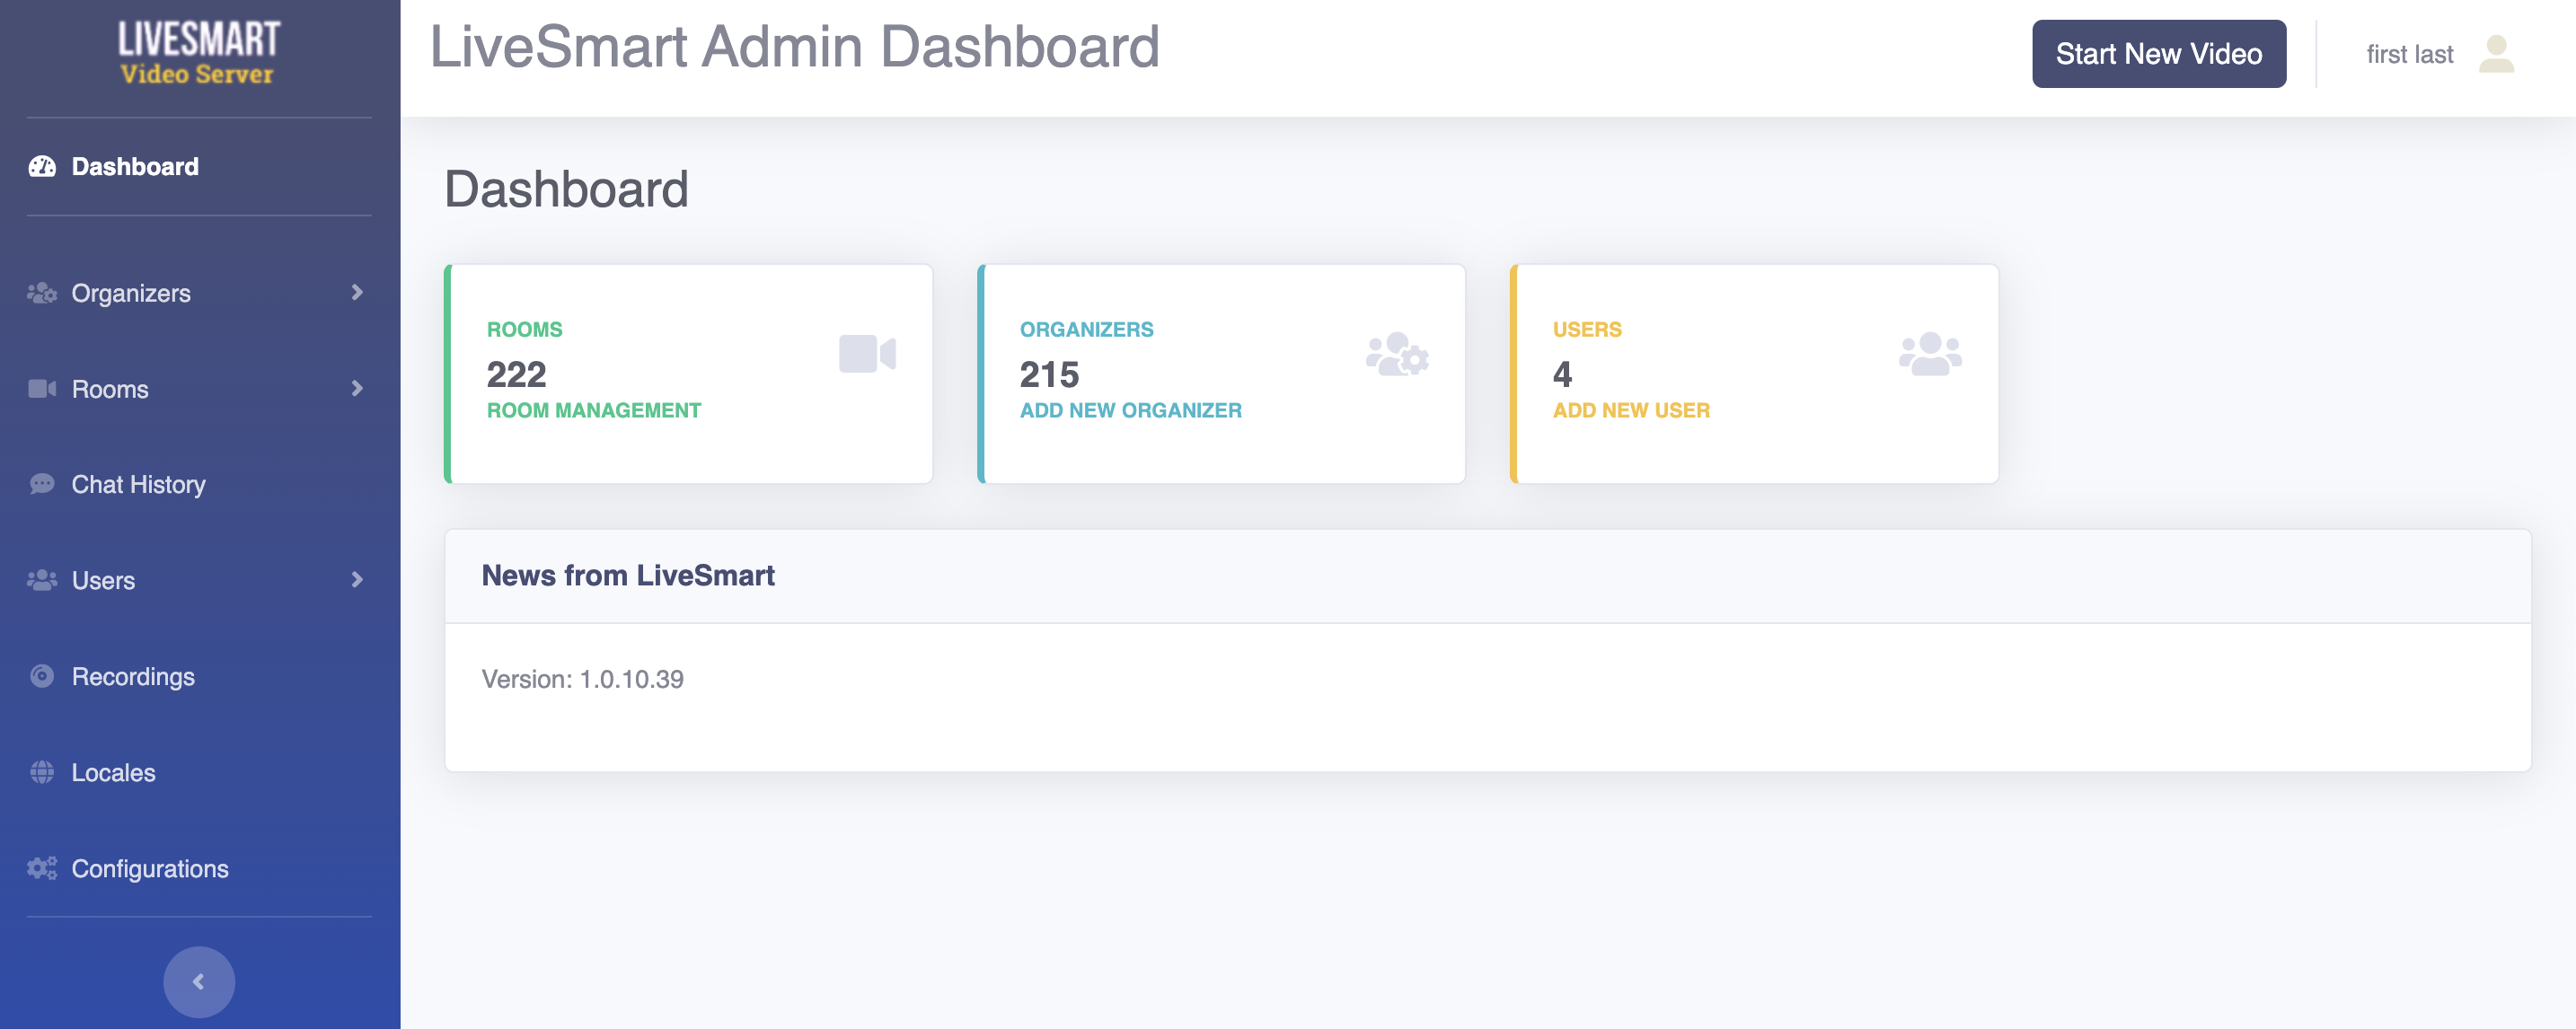
Dashboard panel
The admin panel has a backend information about the organizers, rooms, locales and configuration.
Check here with demo/demo.
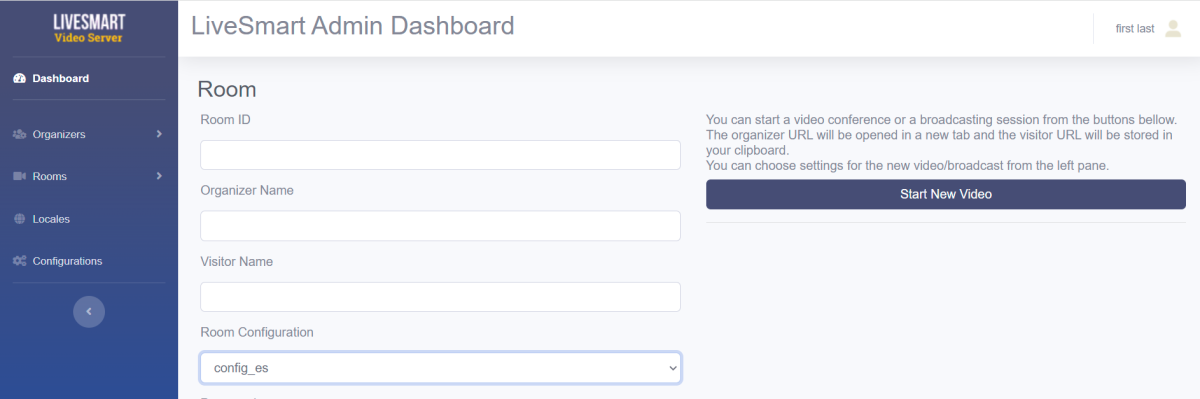
In the Page management you are able to generate custom room. You can specify a time period, duration of the meeting, visitor name, host name, room ID and if the room should be password protected. The save button is saving each generated room in a DB if available.
Private Access
You can set password protection for your meeting in two ways:
– when creating or saving a meeting room set a global password in the Room form;
– from the configuration section in the Dashboard enable Server Side -> Login Form. This will enable users to enter with their email and password and you need to define them in Users section of the Dashboard.Localization
From the Dashboard panel you can assign and change as many as you need localizations.
Go to Locales section and in the field type the name of the locale. It can be any string helping your to identify it later – es_ES, Spanish, SP. Choose the Spanish locale from the list and fill in relevant values.
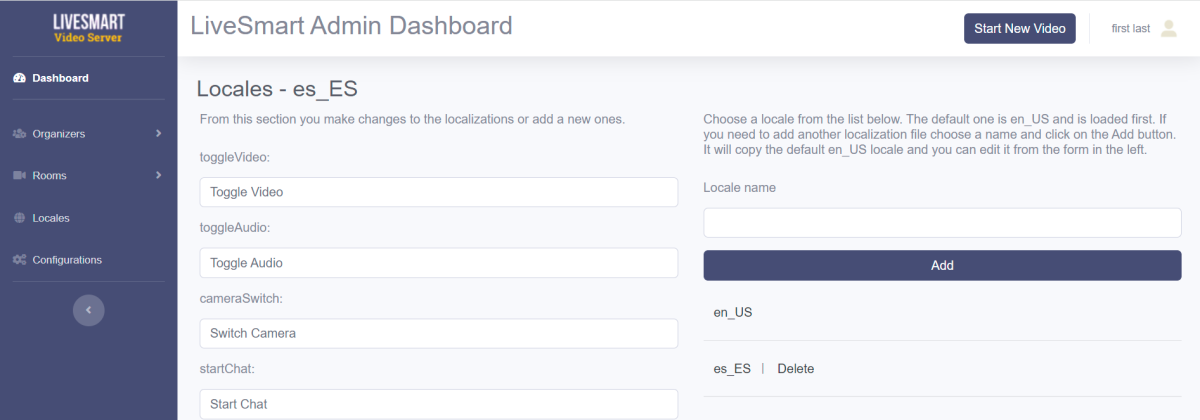
Now you need to assign a new configuration with the new locale. Go to Configuration section and add a new configuration with some name to help you identify this is for the new locale. Of course you can assign the new locale to any existing configuration.
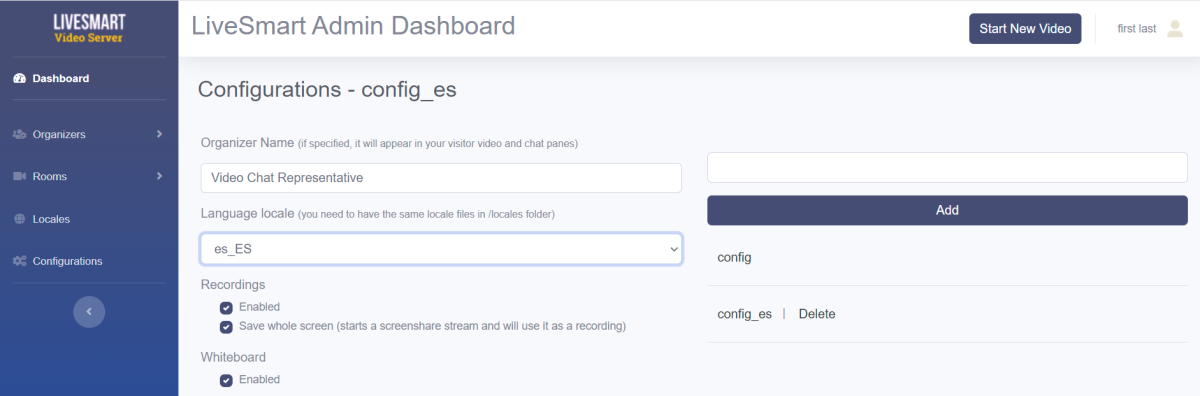
Then from the Room management you can edit, add new or start directly a new room by assigning the configuration with the Spanish locale to it.
Speech-to-text, Text-to-speech and Translate
LSV offers the possibility to transcribe voice to text, or the speech recognition module. It can be enabled from Configuration section of your Dashboard. The default language of the speech recognition is English. All the list of available languages can be seen here.
In addition to the speech recognition, there is a possibility to translate the transcribed text. You need to have a Google API key. In this tutorial is described how to get it.
After you get the key, it needs to be set in the Configuration section in the Dashboard.While typing a chat message your attendee will receive voice. This functionality can be combined with the translation module. For example, you speak in Spanish, your attendee will receive subtitled message and voice in English. Text to speech, together with the speech to text and the translation modules provide the ultimate facility for multilanguage video session tool.
Another option of the transcription module is to use voice commands. This can be enabled from the configuration section of Dashboard. Available commands are: ‘share room’, ‘new room’, ‘exit the room’, ‘start the audio’, ‘stop the audio’, ‘start the video’, ‘stop the video’, ‘start the screen’, ‘stop the screen’, ‘open the chat’, ‘send chat message’, ‘close the chat’, ‘open the whiteboard’, ‘close the whiteboard’, ‘start the recording’, ‘pause the recording’, ‘resume the recording’, ‘stop the recording’, ‘open the settings’, ‘close the settings’, ‘open a file’, ‘close a file’, ‘swap the camera’, ‘raise the hand’, ‘lower the hand’, ‘open email’, ‘stop the voice recognition’.
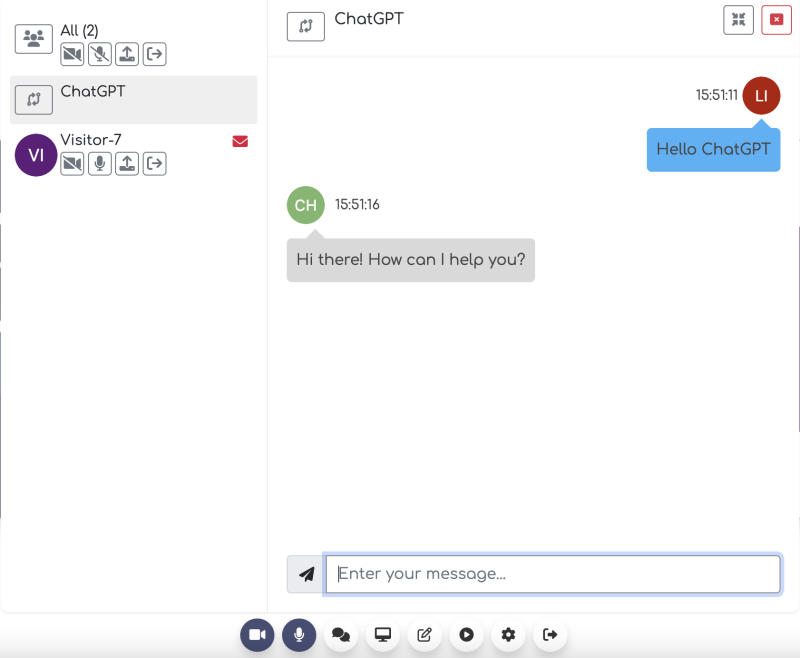
ChatGPT
One of the latest features of LiveSmart Server Video is ChatGPT. You can enable this option and can ask questions to the AI.
After installing or updating prior to 1.0.10 version of the server, you need to
- Goto https://platform.openai.com/
- Create your account
- Generate your APIKey from here
- Update the key in app/src/config.js chatGPT.apiKey and set chatGPT.enabled to true
- Enable ChatGPT from the Configuration section in the Dashboard
Status Button
The contact button is the way your customers can request a video call. It is also a presence indicator showing if you are online.
Add the following code snippet to your site, so you are able to track and communicate with your visitors:
<div id="nd-widget-container" class="nd-widget-container"></div><script id="newdev-embed-script" data-message="Start Video Chat" data-source_path="YOUR_DOMAIN" src="YOUR_DOMAIN/js/widget.js" async></script>The script accepts some data attributes, so you can personalize it:
Data attribute Description data-source_path (*) The website your button resides. It should be HTTPS data-button_css The CSS of the button itself. The default style is located at /css/button.css. There are six prefefined styles that are listed below data-message The label on the button. Default is “Start Video Chat” data-host_name Names of the organizer. This option can be also defined in the config.json file data-visitor_name Visitor name can be set with this parameter. Used when the button is for a specific predefined user. data-tenant Defining specific organizer scope that only organizer with the same ID in the organizer dashboard will be notified of client presence. data-config Define a config file for the meeting. It needs to be present in /config folder of LiveSmart. Otherwise it will fallback to the default configurations; data-iframe_id ID of target iframe. If you want the video window to open in an iframe and not in popup. Make sure the “allow” attribute with values “camera, microphone” is included; data-intab If this is set to true, the video window will open in a new tab, not in popup window. data-offline_email Contact email when you are not available and the button is offline. By clicking on the button a contact form will open and the visitor can add his inquiry there. data-offline_page URL of the contact page. If set, when the visitor clicks on the offline button, he will be redirected to the specified contact page. data-datetime Datetime added in the format YYYY-MM-DDThh:mm:00.000Z in UTC. data-duration Duration of the meeting in minutes. data-disablevideo Option to disable video for the meeting. data-disableaudio Option to disable audio for the meeting. * Mandatory data attribute Predefined button styling
CSS File Button button_green.css 
button_blue.css 
button_gray.css 
button_lightgray.css 
button_lightred.css 
button_orange.css  Keymaster
In this demo the organizer of the meeting (teacher, tutor, streamer) starts with camera and microphone on, but his attendees are muted and video is disabled. They can take part in the meeting with video and/or audio by raising a hand. The meeting organizer can mute/unmute participants, allow/disallow video from the setting options, or allow the top right corner. Also to enter the meeting is required the host admission approval.
1. Open the organizer link.
2. Click on the viewer link to copy it in the clipboard and send it to a new device or open in incognito tab and receive live streaming.
From the visitor side, you can share screen, raise a hand to request to speak in the conference and participate in the common chat.
WARNING! Please note that you have to allow your browser to access camera and/or microphone in order the video chat to work.
In order to reduce the echo if you are on the same machine, you can mute microphone or lower the volume. For optimal demo results it is good to use two different devices.
If you need assistance or facing problems with the demo, please do check the contact options.
LiveSmart can be legally purchased only from CodeCanyon. If you have obtained the software from another source, you face the risk of it not working properly, or to have inclusions that may harm your system.
KeymasterIn this demo you can check how the scheduling feature works.
Choose a date and meeting duration from the form below. You may define doctor and/or patient names and if the room is protected with a password.
When you click on the Generate link button a new page will open – this is the doctor link.
The patient link is remembered in your clipboard, so you can open it in another tab or send to another device or computer.
Date: Duration: Host: Visitor: Room: Password: WARNING! Please note that you have to allow your browser to access camera and/or microphone in order the video chat to work.
In order to reduce the echo if you are on the same machine, you can mute microphone or lower the volume. For optimal demo results it is good to use two different devices.
If you need assistance or facing problems with the demo, please do check the contact options.
LiveSmart can be legally purchased only from CodeCanyon. If you have obtained the software from another source, you face the risk of it not working properly, or to have inclusions that may harm your system.
KeymasterLiveSmart Server Video is an advanced standalone web application with video, audio, recording, screen sharing and file transfer face-to-face communication channels and integrated chat for theoretically unlimited attendees. In order for flawless work and installation please check the requirements. For detailed installation instructions please read manual and video tutorial at the bottom of this page.
LiveSmart Server Video can be legally purchased only from CodeCanyon. If you have obtained the software from another source, you face the risk of it not working properly, or to have inclusions that may harm your system.
Requirements
- TCP ports 80, 443 and 9002 are accessible;
- Opened port ranges 40000-40100 both for TCP and UDP;
- Domain or subdomain (such as sfu.example.com) for setup with a valid SSL certificate;
- Node.js at least v16;
- python version >= 3.8 with PIP;
- PHP/MySQL recommended;
- root access to hosting server (VPS or dedicated server);
- usage of Ubuntu or AlmaLinux hosting server is highly recommended;
More for server requirements can be found here.
Current release update manual
Features in the current release (1.0.22):
- Updated Video AI avatars UI and added new advanced functions;
- Added hourly payment facility;
- Performance improvements and fixes;
This release needs to be updated manually. Get the zip file from CodeCanyon, update all files from public/dash, public/js, public/css, public/pages and public/locales folders. Replace src/livesmart.js, src/Peer.js and server/script.php files. Execute the server/dump_1.0.22.sql file in you MySQL client. Do
npm updateand restart your server withpm2 restart livesmart.Features in previous releases:
- Personalization and image avatars;
- Presence button;
- Breakout rooms and reactions;
- LiveSmart can be used to monetize your incomes;
- Added subscriptions, plans and payments with PayPal, Stripe and Authorize.net;
- UI changes and bug fixes;
How to enable ChatGPT
- Goto https://platform.openai.com/
- Create your account
- Generate your APIKey from here
- Update the key in src/config.js chatGPT.apiKey and set chatGPT.enabled to true
- Enable ChatGPT from the Configuration section in the Dashboard
Fresh installation
Installation of LiveSmart Server Video is easy and straightforward and done in several easy steps:
- Public folder from the zip file should be in your web public folder. The src folder and package.json file should be outside of your web server public folder;
- Run https://yourdomain.com/install and fill in necessary information;
- In the root folder where is your package.json file execute in the console with root access
npm install,npm install -g pm2and thenpm2 start src/livesmart.js - You LiveSmart is now available at https://yourdomain:9002. In order to use it without the port number at the end, add these lines to your Apache config file for your domain and restart it:
ProxyRequests off

SSLProxyEngine on

SSLProxyVerify none

SSLProxyCheckPeerCN off

SSLProxyCheckPeerName off

SSLProxyCheckPeerExpire off

ProxyPreserveHost On

<Location "/">

Order allow,deny

Allow from all

ProxyPass https://localhost:9002/

ProxyPassReverse https://localhost:9002/

</Location>

<Location "/dash">

ProxyPass "!"

Order allow,deny

Allow from all

</Location>

<Location "/server">

ProxyPass "!"

Order allow,deny

Allow from all

</Location>
or if you are using nginx webserver:
location / {

proxy_set_header X-Real-IP $remote_addr;

proxy_set_header X-Forwarded-For $proxy_add_x_forwarded_for;

proxy_set_header X-NginX-Proxy true;

proxy_pass https://localhost:9002/;

proxy_ssl_session_reuse off;

proxy_set_header Host $http_host;

proxy_cache_bypass $http_upgrade;

proxy_redirect off;

}

location /dash {

}

location /server {

}
- Go to https://yourdomain/dash, login with admin/admin and activate your LiveSmart instance;
KeymasterLiveSmart Products
Both products are video conferencing and streaming tools. They differ in terms of used technologies and the number of attendees that can be handled in a meeting.
LiveSmart Server Video is a media server component capable of receiving multiple media streams. It installation is more complex, requires better infrastructure and some administration knowledge, but can handle theoretically unlimited number of attendees in a meeting.
LiveSmart Video Chat is a light weight peer-to-peer tool, with less requirements, simple server, but can handle max 4-5 attendees in a video meeting and up to 20-30 in a broadcasting session.LIVESMART SERVER VIDEO LIVESMART VIDEO CHAT Attendees It is installed server side. Theoretically allows unlimited attendees. Based on peer-to-peer connections. Attendees in a video conference are limited up to five in a room. Broadcasting is up to 30-40 attendees. Installation and requirements Requires more serious infrastructure, own domain or subdomain. More about requirements and installation tutorial can be found here. Easy and straightforward installation, can be installed together with other websites. Although it is easy to install and maintain, it has some requirements. Live Video Demo with screen sharing, recording, file sharing, user management, whiteboard, YouTube channel streaming and file transfer Basic demo with screen sharing, snapshot, picture-in-picture and file transfer Online scheduling Health-care solution. Schedule meetings on definite timeframe. Meeting is automatically stopped at the end and there is a timer showing the remaining time. Health-care solution. Broadcasting and streaming Demo. Ideal for online classes. The tutor is with his camera and microphone on, while attendees are muted. They can raise a hand and request permission to talk or do video. Demo. There can be one presenter and up to 30-40 attendees. Monetization Learn how to make money from LiveSmart Server from this article. Not yet available Speech recognition, text to speech, translation Yes. Demo is available here Yes. Demo is available here ChatGPT and Video AI Avatars Yes, check this demo No Reactions and Breakout Rooms Yes No Admission Yes Yes File transfer Yes Yes Recording, save on server and autostart options Yes Yes Waiting room, where attendee can adjust video and audio settings Yes Yes Whiteboard Yes Yes Private rooms Yes Yes Snapshot Yes Yes Stream a video Yes, from YouTube and local file Yes, from a local file User friendly URL shortener Yes Yes Switch camera Yes Yes Localization Yes Yes Users and user login Yes Yes Chat history Yes Yes Social login No Yes Virtual background Yes Yes Chat engagement No Yes Presence button Yes Yes Integrations Integration with WoWonder, WonderTag and Moonlight themes, PlayTube Platform and Sngine social platform. Also integrations with JustFans and Perfex CRM. Integration with WoWonder, WonderTag theme, PlayTube Platform, DocTreat theme and LatePoint. For more info, visit this Integration guide. Video logs Yes Yes Offline form No Yes Chrome Assistant No Yes WordPress Plugin Yes Yes KeymasterThis is a demo page, where you can see how LiveSmart Server Video works with default settings.
1. Open the organizer link;
You will see the initial entry form. By providing a common name, you can enter the room as room owner.2. Click on the corresponding visitor link so it is copied in the clipboard then send it to a new device or open in incognito tab.
3. After the visitor enters the room, both attendees will be able to do a video call and the organizer to share his screen. Both parties can share screen, share files, participate in whiteboard. Organizer can control video/audio of attendees and remove and attendee.
WARNING! Please note that you have to allow your browser to access camera and/or microphone in order the video chat to work.
In order to reduce the echo if you are on the same machine, you can mute microphone or lower the volume. For optimal demo results it is good to use two different devices.
If you need assistance or facing problems with the demo, please do check the contact options.
LiveSmart can be legally purchased only from CodeCanyon. If you have obtained the software from another source, you face the risk of it not working properly, or to have inclusions that may harm your system.
KeymasterIn this demo you can test virtual backgrounds.
1. Open the organizer link;
You will see the initial entry form. By providing a common name, you can enter the room as room owner.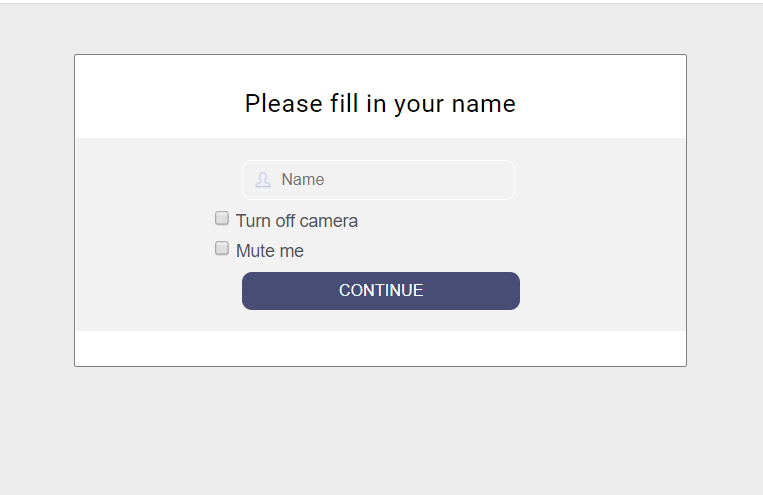
2. Click on the corresponding visitor link so it is copied in the clipboard then send it to a new device or open in incognito tab.
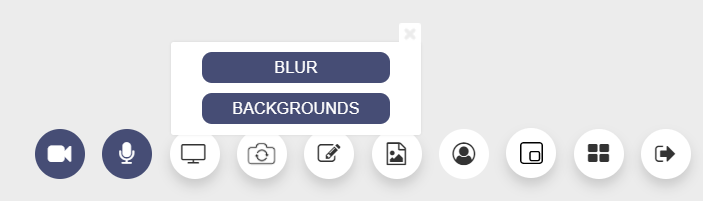
3. After the visitor enters the room, both attendees will be able to do a video call. From the virtual background icon
 you can can blur your background or choose a fancy image for a background wallpaper.
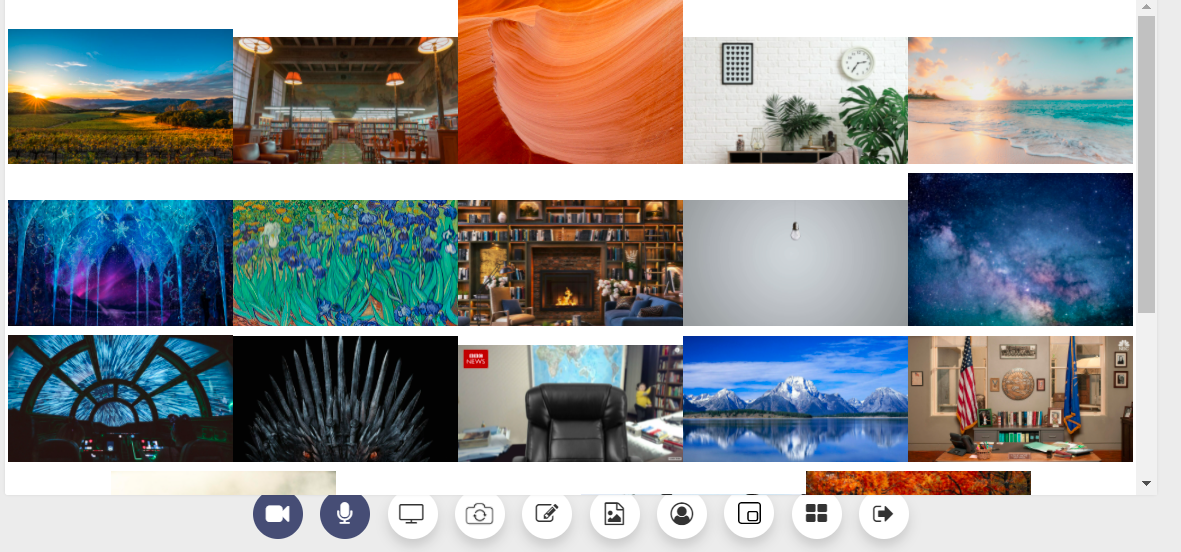
Also you can choose any of the backgrounds images, located in img/virtual folder:
WARNING! Please note that you have to allow your browser to access camera and/or microphone in order the video chat to work.
In order to reduce the echo if you are on the same machine, you can mute microphone or lower the volume. For optimal demo results it is good to use two different devices.
If you see “Waiting for the other party to join” label, make sure both links are opened.
If you need assistance or facing problems with the demo, please do check the contact options or visit our support forum.
LiveSmart can be legally purchased only from CodeCanyon. If you have obtained the software from another source, you face the risk of it not working properly, or to have inclusions that may harm your system.
-
AuthorPosts